Tuesday, July 24, 2012

7-23.

One more coat to go!  (and the gunnels).  This afternoon we sanded for the last coat, but didn't have time to paint, so we'll put the last coat on and start the gunnels this coming weekend. 


In between painting, we realized we needed to start getting everything else ready.  So we lashed the sails onto the boom and lug, attached the tiller extension to the tilller, attached the pintles and cam cleat to the rudder stock, and whipped the uphaul for the rudder.


I just want to say again that whipping is really fun.  It is strangely satisfying.  I wish I had more ropes that needed whipping.


Tuesday, July 17, 2012

7-16.

Prepping for the second coat of primer.  I taped off the maple (and somehow still got paint on it - but it wipes off fine when still wet), we sanded, and painted.  I had spent the week pondering how to have a more efficient painting process so that we could get the paint rolled on and tipped out before it dried and left an ugly finish.  The new strategy worked soooo much better!  Daddy started on the floor while I worked on the centerboard case.  When that was done we moved on to frames in the bottom, seat sides, and seat tops.  Then Daddy did the deck very carefully and quickly while I started the sides.  This is the trickiest part because of the gunnels and all the gaps and corners.  This time we rolled as close up under the inner gunnels as possible while doing the frames, then came back when doing the insides of the gunnels to meet up with where the side paint stopped.  This coat looks fabulous - not like a kindergartner took a brush to the boat (which is basically what anything I paint will normally look like).  


We were planning on painting Monday, also (putting the first coat of color on the inside), but some spots of primer hadn't quite dried yet, so we're waiting for those to dry before sanding.  Instead, we glued leather on the lug and boom and fixed the trailer lights.


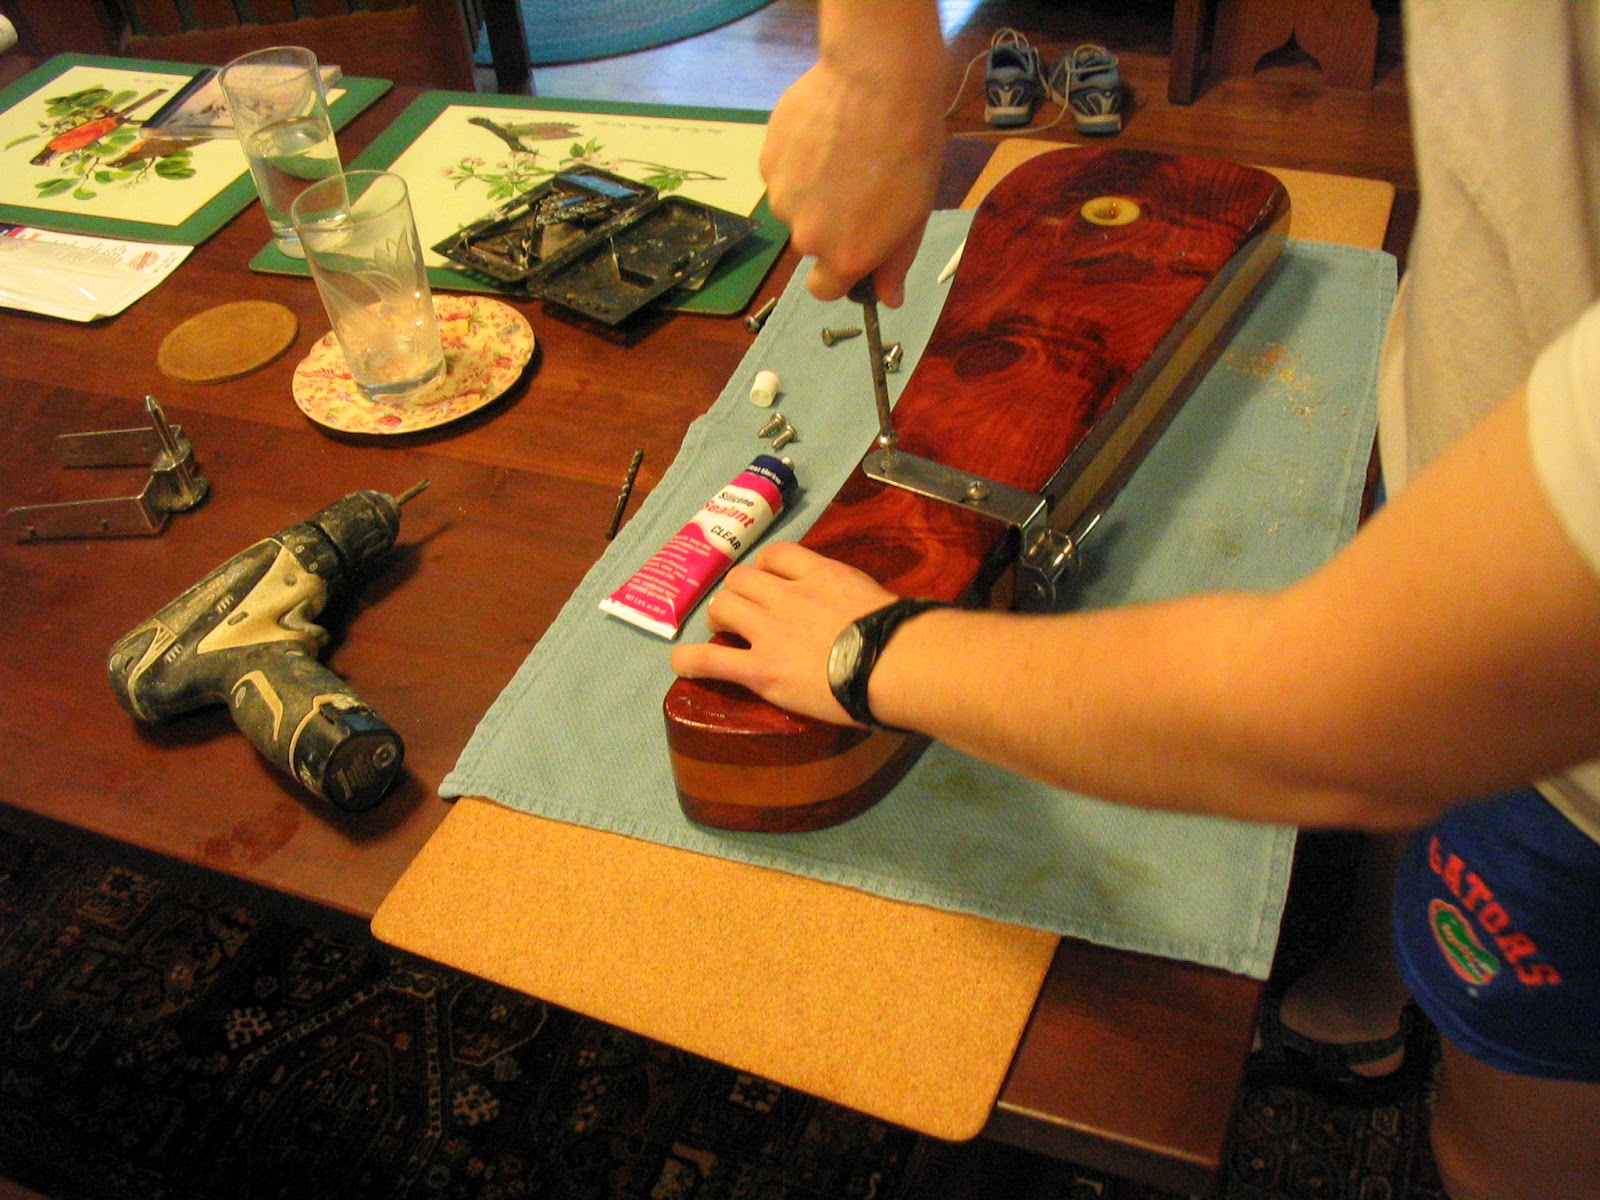
Cut out the leather strips, sanded the square sides of the lug and boom, and applied the contact cement - a super hard-core version of rubber cement that looks like caramel but smells disgusting.  You smear it on the surfaces to be glued together, let it dry for 15 minutes, then press them together with 75lbs of pressure (per some small area).  Had to reapply the glue on the leather as it is a porous surface and sucked the glue right up on the first application.  Now the lug and boom are ready to go - the leather protects them and the mast where they'll be rubbing as the sail is raised and lowered.


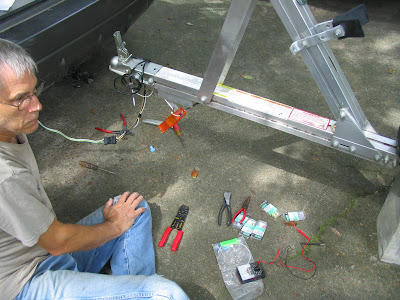
Then the fun part.  Where is an electrical engineer when we need one - Carson?!  The trailer lights had been working for the most part (all except the right turn signal) when we first finished the trailer and tested it on my mom's car.  When we hooked it up to my car, though, nothing was working, so we started taking things apart.  We disconnected the running lights that we determined were unnecessary and had never worked, reconnected the wire leading to the back right light (twice to no avail), and took the bulbs out and switched them back and forth between sides.  Finally we got everything working but the right turn signal on my mom's car, but my car still nothing.  A current was coming through the wires in my car, but the lights just wouldn't work, so I had to take the car into the trailer place that installed the hitch.  They said there had been a short in the electric box and replaced it and somehow fixed the right turn signal.  I don't know how because I'm not too much of a physics person...


Tuesday, July 10, 2012

7-8.

Put the first coat of primer on the inside.  First we had to wash the boat to remove any amine blush from the epoxy, and step and mast and raise the sail to know what point we needed to paint the top of the mast.  Of course it happens to be the middle of a hot and humid, typical Florida summer when we are finally ready to paint, and this makes painting that much more challenging.  Turns out painting the hull was easy.  Because painting the inside with all its nooks and crannies is terribly hard.  


Working on the last gunnel.


The voyageur canoe style double gunnels, as awesome as they are, make painting extremely difficult.  It doesn't help that paint is drying so fast you can barely tip it out (looking into using a thinner for the next coat).  Needless to say, this first coat was a good practice!  We learned a lot about how we're going to have to attack the job, and we will keep learning, hopefully quickly, as the coats go on, so that the later coats will look somewhat as nice as the hull.


I will say my tape job on the maple turned out pretty well.  We're going to have to varnish the maple at least one more time, though, because Daddy accidentally sanded one of the quarterknees on top as he was sanding the gunnel and I accidentally sanded one on the bottom (out of view - we almost decided to paint underneath, but I wanted to keep them all wood).


Thursday, July 5, 2012

7-5.

Rolled and carried her out of the garage, flipped her over in the driveway, and slid the trailer back underneath. Her family fleet awaits her, tarped, in the background (left-16ft Cape Horn power boat, middle-1976 Drascombe Dabber, right- Blue Tang, home made Spindrift 12' designed by Graham Byrnes).


Seeing how the cedar is going to look with the color. 


Still have lots to paint, but with the hull done, it seems like a boat ready to sail.


Wednesday, July 4, 2012

July 4th.

Well, due to weather, work, and mess-ups we just now finished the hull.  This past weekend we put the last two coats of paint on the hull (we were going to stop at the end of the last can of paint, but when we started what was to be the last coat, disaster struck - roller hairs and debris in the paint sticking all over the hull).  So we went ahead and painted, then immediately ordered another can of paint and bought higher quality roller covers.  Now there are 5 or 6 coats of paint on the hull, I lost count somewhere along the way.  


This morning we attached the metal plate that guards the skeg.  We used marine adhesive, squeezed into the holes (that we had to drill out again because they weren't big enough, maybe all the coats of paint narrowed them down) and ran along the skeg.  This stuff is sticky and gooey.  I still have remants stuck to my fingers after a shower and multiple hand washings.


Where's Shadow?!


She has learned that we are more likely to throw the ball for her if she pushes it under the gate so it rolls over to the boat where we're working.  Today she patiently waited, peeking out from under the fence, while the ball sat under the sawhorses.


Screwed the plate on, then tried to clean up a bit.  Finer cleanup will have to be done when it cures with a knife.  This means we can flip the boat back over and start painting the inside!  No estimate on when we'll be done.