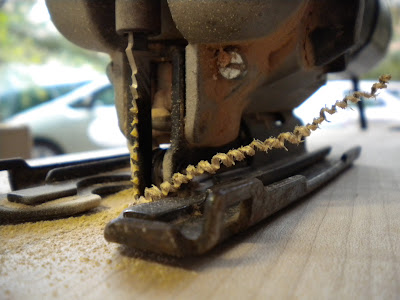
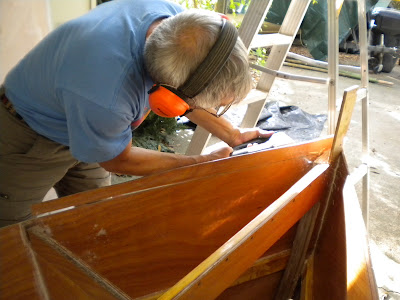
No pictures yet, but this weekend we worked on the mast step, the king plank, and various other little parts and pieces. The mast step will be a block made of pieces of maple, the king plank is a nice oak board from Seattle. I'm learning family history as we go along - I had no idea my dad had worked at a furniture "oakery" in Seattle - that's where some of the random boards are from that have been in storage in the garage since before I was born! There's no mention of the king plank on the plans, so we're just figuring it out step by step. Had to cut down the spine piece to fit the board in, and we'll have to cut a notch out of frame 1 for it to rest in. Also have to figure out how to get it to line up with the mast step so the mast doesn't come up at some crooked angle! And we cut out quarter knees to go in the back corners of the boat for strength.
Today Daddy worked on a few more things while I played disc golf. Glued the gunnels together (the boards we had were too short, so we scarfed them to make long boards. He also cut out some nice little supports for the edges of the centerboard cap/seat where the seat overhangs the centerboard case and cut out a couple test blocks to fit in between the sides and the inside gunnels (still not sure what these are actually called).
Sail has been ordered - egyptian cotton! - sounds exotic. While the Blue Tang and my dad's Drascombe have dark red (tanbark) sails, I'm not a big fan of those, so we went with a white/off-white color.
Monday, December 19, 2011
Sunday, December 11, 2011
12-11.
Today we worked on seat supports, inner railings (not actually sure what these are called), seats, and transom reinforcement.
When we made the frames, the designs called for notches in frame 1 where the inner railings (I"m making this name up - I'll figure out what they're called later) are inserted. These inner railings are kind of like a gunnel that run along the top of the side for a little side deck to be attached to. There are notches in the top of each frame for the wood to sit in, but on frame 1, the wood won't fit because the notches were designed at 90 degree angles, without taking into account that the wood fitting in would be coming in at an angle, following the curve of the boat.
So we had to cut out the notches at an angle with the Japanese handsaw (until we realized there are nails in the frame that messed up the saw blade) and hacksaw and chisel out the openings to fit that inner railing at the right angle. The gaps left will be filled with epoxy. Just one more little thing overlooked in the plans that would have been helpful and made the boat building less sloppy if it had been addressed initially.
We also had a few screws poking out into the boat that I ground down so that when someone reaches a hand way back into the seat compartment they aren't rudely grabbed and mauled by a sharp point.
And we made the seats. We decided to save some money here because we are commissioning a mast from a local carpenter. The mast is going to be amazing and hollow and expensive - more on this later. So we went with cardboard and duct tape for the seats, which is also easier to work with than wood and epoxy. They fit nicely. Slap a little epoxy on for strength, and we're good to go (only rated to 150 lbs, sorry guys).
Just kidding - the cardboard cutouts are just to get an idea to trace onto plywood when we're ready to construct the seats.
In the picture above, you can also notice a change we made from the plans. The plans call for a deck going across the whole boat between frames 2 and 3 (where the seats begin up front to where the centerboard case ends (the curly maple seat in the middle)). We decided we wanted more leg room and less seat/decking covering everything up, and we wanted more access to the centerboard case, AND the supports for the seat on the centerboard case are too low - not flush with the frames or seat supports on the sides. This we thought might have been our mistake, but with checking and rechecking measurements many, many times, it appears that we followed the plans and that this is another (bank) error, (not in your favor, do not collect $100.)
Anyways, since we decided to leave that space open for foot room, we cut off the tops of frame 3 so that we wouldn't have shin hitters in the middle of the cockpit. Instead we now just have toe stubbers! But we have to deal with those because they are structurally supporting the boat and are indispensable.
A curlicue of curly maple :)
We debated between cypress and maple for a reinforcement for the top of the transom. Decided on curly maple, to keep continuity with the rudder, tiller, and rowing seat/centerboard cap. Found a beautifully grained piece and traced the top curve of the transom onto it, cut that out, and used the bridge from the cut out to trace a matching bottom curve. We will also match the curves of the transom doublers to the ends of this maple. This piece will be varnished to show off the wood.
12-5.
This feels like real progress!! Last weekend we finally flipped the boat over. Daddy prepared by unscrewing all of the legs from the strongback (ladder on the floor), then we laid out burlap and boat cushions to protect the hull, and brought over one more strong body to lift the boat. Carried it outside and turned it over. It was a lot lighter than we were expecting, which is good.
We unscrewed the legs from the frames, and got it looking almost like a real boat.
She is very wide - my dad calls her a tub. We'll see what it feels like in the water. Here you can really see what the insides look like now with the frames that we started construction with, to the seat supports and stringers running the length of the boat, the centerboard case, and the side, chine, and bottom panels.
There is much sanding in our future - this area between frames one and two is open, so all the messy epoxy has to be cleaned up and looking nice and smooth before we paint. The mast will come down to the mast step towards the front of this area. In front of frame one (the big piece with a hole in it) will be a compartment with an access port, and a deck over the top.
Once we were finished admiring, we carried the boat back into the carport and rested it back on the strongback, padded with burlap bags.
The bow seems really tall - I think it should have a figurehead.
We cut off the remaining piece of plywood sticking out of the bow and cut down the side panels flush with the top of the frames.
An exciting weekend!
Tuesday, December 6, 2011
End of November/Beginning of December
Still working on finishing up the rudder, rudder stock, and tiller. Adding coats of epoxy, sanding, adding more epoxy, fiberglassing, etc.
Messed up on the rudder stock here while trying to save fiberglass - good thing we caught it before we glued it down - I traced the rudder stock, then for some reason had to re-trace, leaving a sharpie mark down the middle. That would've looked great! We just traced it out on a clean piece, and have avoided any more rogue sharpie marks.
We've contacted a sail maker and a local carpenter for the mast. Updates to come. In the meantime, while you're waiting for the next big post, coming soon with major updates(!), here is a cute picture of Shadowfax cozy under her giraffe blankie. She turned a year old around Thanksgiving.
Subscribe to:
Comments (Atom)


