Today we worked on seat supports, inner railings (not actually sure what these are called), seats, and transom reinforcement.
When we made the frames, the designs called for notches in frame 1 where the inner railings (I"m making this name up - I'll figure out what they're called later) are inserted. These inner railings are kind of like a gunnel that run along the top of the side for a little side deck to be attached to. There are notches in the top of each frame for the wood to sit in, but on frame 1, the wood won't fit because the notches were designed at 90 degree angles, without taking into account that the wood fitting in would be coming in at an angle, following the curve of the boat.
So we had to cut out the notches at an angle with the Japanese handsaw (until we realized there are nails in the frame that messed up the saw blade) and hacksaw and chisel out the openings to fit that inner railing at the right angle. The gaps left will be filled with epoxy. Just one more little thing overlooked in the plans that would have been helpful and made the boat building less sloppy if it had been addressed initially.
We also had a few screws poking out into the boat that I ground down so that when someone reaches a hand way back into the seat compartment they aren't rudely grabbed and mauled by a sharp point.
And we made the seats. We decided to save some money here because we are commissioning a mast from a local carpenter. The mast is going to be amazing and hollow and expensive - more on this later. So we went with cardboard and duct tape for the seats, which is also easier to work with than wood and epoxy. They fit nicely. Slap a little epoxy on for strength, and we're good to go (only rated to 150 lbs, sorry guys).
Just kidding - the cardboard cutouts are just to get an idea to trace onto plywood when we're ready to construct the seats.
In the picture above, you can also notice a change we made from the plans. The plans call for a deck going across the whole boat between frames 2 and 3 (where the seats begin up front to where the centerboard case ends (the curly maple seat in the middle)). We decided we wanted more leg room and less seat/decking covering everything up, and we wanted more access to the centerboard case, AND the supports for the seat on the centerboard case are too low - not flush with the frames or seat supports on the sides. This we thought might have been our mistake, but with checking and rechecking measurements many, many times, it appears that we followed the plans and that this is another (bank) error, (not in your favor, do not collect $100.)
Anyways, since we decided to leave that space open for foot room, we cut off the tops of frame 3 so that we wouldn't have shin hitters in the middle of the cockpit. Instead we now just have toe stubbers! But we have to deal with those because they are structurally supporting the boat and are indispensable.
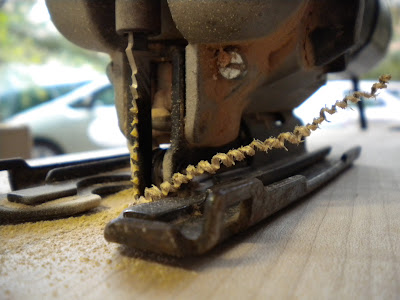
A curlicue of curly maple :)
We debated between cypress and maple for a reinforcement for the top of the transom. Decided on curly maple, to keep continuity with the rudder, tiller, and rowing seat/centerboard cap. Found a beautifully grained piece and traced the top curve of the transom onto it, cut that out, and used the bridge from the cut out to trace a matching bottom curve. We will also match the curves of the transom doublers to the ends of this maple. This piece will be varnished to show off the wood.


No comments:
Post a Comment