Sunday, July 31, 2011

June

Attaching the stringers was an adventure in patience. I did not relish this part and am glad we're finally past it, although there is more to come that will be very similar...
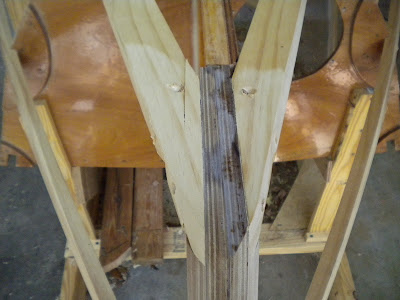
After bending the wood we fit it into the notches and had to cut the ends to meet up with the bow at the right angles. This is tricky when you haven't had geometry since 7th grade, and when you were never good at geometry to begin with! Trying to visualize how two pieces of wood will meet up if you cut one at a certain angle is not in my grasp, so Daddy figured most of this out. Only one spot didn't come out right, and it was simply remedied by adding a little chunk of wood between the stringer and the notch in the bow (the stringer got cut too short, so it didn't come up to meet the notch). In the picture you can see where the extra piece of wood is on the left side between the stringer and the bow.

Once the stringers were glued and screwed into place, we planed them down to the correct angles so that the bottom, chines, and sides will fit. The stringers are where the bottom, chines, and sides meet and what they are attached to, along with being attached to frames. Planing with Brian's electric planer is fun, lots of sawdust shoots out and it does the job fast. Just have to be careful to keep planing everything evenly and not to hit the frames as you pass by.

Then we went across with the belt sander for fine tuning, checking the angles often with scrap plywood to make sure the panels would fit well when they are ready to go on.

More June

A rough approximation of the bottom. A nice scarfed joint (where the pieces of plywood come together). Scarfing is fun - more to come in July.

Cutting out the hole for the centerboard. This was sort of tricky to figure out exactly where to put since we couldn't just go underneath the boat and draw lines around the edges of the case. We were careful to cut inside the lines and then just had to go back many times to slowly widen the hole until it fit snugly onto the centerboard case.


Once we got the centerboard hole cut and fit, then it was time to shape the bottom and attach it!

June-July

Getting the bottom of the boat on was not very exact as you can see, but it worked out well. All we needed was the special pencil to draw the lines for us. But really, we didn't follow any plans to draw the bottom panel, instead after scarfing two pieces of 9 mm ply, we laid a rough cut-out over the frame and drew an outline along the stringers with a flat-sharpened pencil (a normal pointy pencil wouldn't reach into the recess between the stringer and plywood. We left a little wiggle room when we cut it out that we can sand off later. We also decided to make the bottom panel come flush with the edge of the stringer so that it will butt up with the chine panel (the piece between the bottom and the sides), leaving a v-shaped gap at the seam that will be filled with epoxy, rounded off, and fiberglassed. This was our decision since there wasn't any guidance in the plans.


Cutting along the curvy lines...

A view from underneath after the bottom panel has been glued on. Soon the boat might actually float!

July

The sides of the boat are going on next. Again, the plywood is too short, so we have to scarf two pieces together. Here is the beginning of the scarfing procedure. After following the plans (we hadn't done that in a while) to draw out the side panel on both pieces of plywood, we lined them up approximately and clamped them onto the stringers to make sure we'd have enough wood at the bow.

The two pieces of plywood will soon become one!

Once we've determined exactly where the scarf will be, we turn one board over and line up the top edge with the line drawn on the bottom piece. There is a certain ratio for the width of the plywood that determines how far back the scarf has to start. The sides are made out of 6 mm ply and I think we had to go back 48 mm, so that would be 8 mm for every 1 mm of ply.
Then we screw down the boards onto the sawhorse so they can't move and start sanding. On the bottom piece, we used the planer since it was 9 mm ply, but the 6 mm went really fast with just the belt sander. You make sure each layer of ply is sanding down evenly by checking that the strips of wood you see are about parallel and even. The trick is to not sand above the pencil mark on the top piece and to get the pointed edges down to a feather edge (the very last ply) without sanding away too much. I'm pretty bad at using the belt sander, so Daddy worked on this one.

Once it's all sanded nice and evenly, the top board gets flipped back over and should fit perfectly onto the bottom board - the angles match up and it is like you have one piece of wood. Then we glue the two together, nail them in place (also to the sawhorse), clamp them in place, and let the glue dry. And then you've got one long piece of plywood!

After scarfing one side, the parents are on vacation, so building is on hiatus. I'll probably work on filling some countersunk screw holes on the bottom while Daddy's gone, but the sides will actually go on when they're back from vacation.