Monday, March 26, 2012

3-26.

Got the trailer all set today.  Adjusted the bunks where they best fit the curve of the bottom of the boat and provide the most support to the boat.  Once everything was in the right place we drilled into the bunk runners for future bolting (first we're going to paint them), and for today we just clamped them into place while we rolled the boat around and worked with the mast.  


Rolled the boat into the front yard to be clear of overhead tree limbs.  We had to sand the base of the mast a little more for it to fit into the mast step, and we had to cut out the opening where the mast fits into the deck a little bit more.  Finally the mast fits perfectly!


Here is the mast in its resting place.


We also got the rudder stock and tiller into place.  First we screwed the pintles onto the rudder stock.  We had to center the tiller in the transom slot, then hold the rudder stock in place while we marked where the gudgeons needed to be attached to the transom.


Apparently a gudgeon is also a fish - tried a google image search to figure out which is the gudgeon and which is the pintle, and found tons of fish pictures!


Monday, March 19, 2012

3-19.

Don't forget about the gunnel color poll above.  See the post below for information and links to see the different colors! 

Yesterday and today were spent working on the last seat compartment.  We don't have hinges yet, so it's not installed, but it's all ready for when we do get the hinges.  We first got the plywood seat top to fit between the side seats, cutting with the jig saw then sanding the edges down until it fit nicely.  Then we built a frame out of 1x2 (approx) for the under side of the plywood.  In order for the seat framework to fit down into the frame below, we had to cut out notches, using the Japanese hand saw, the jig saw, the coping saw, and the Japanese hand saw again (this is the best saw ever)!  


Here's the seat with frame attached, fitting in well.  We glued the frame onto the plywood today, and somehow it got shifted just a tiny bit.  When we did a dry run, it fit perfectly into the notches, with a little room to spare (we had to cut one notch out a little bit more), but now there is a slight resistance to fitting down into a notch - so some sanding will be called for.  


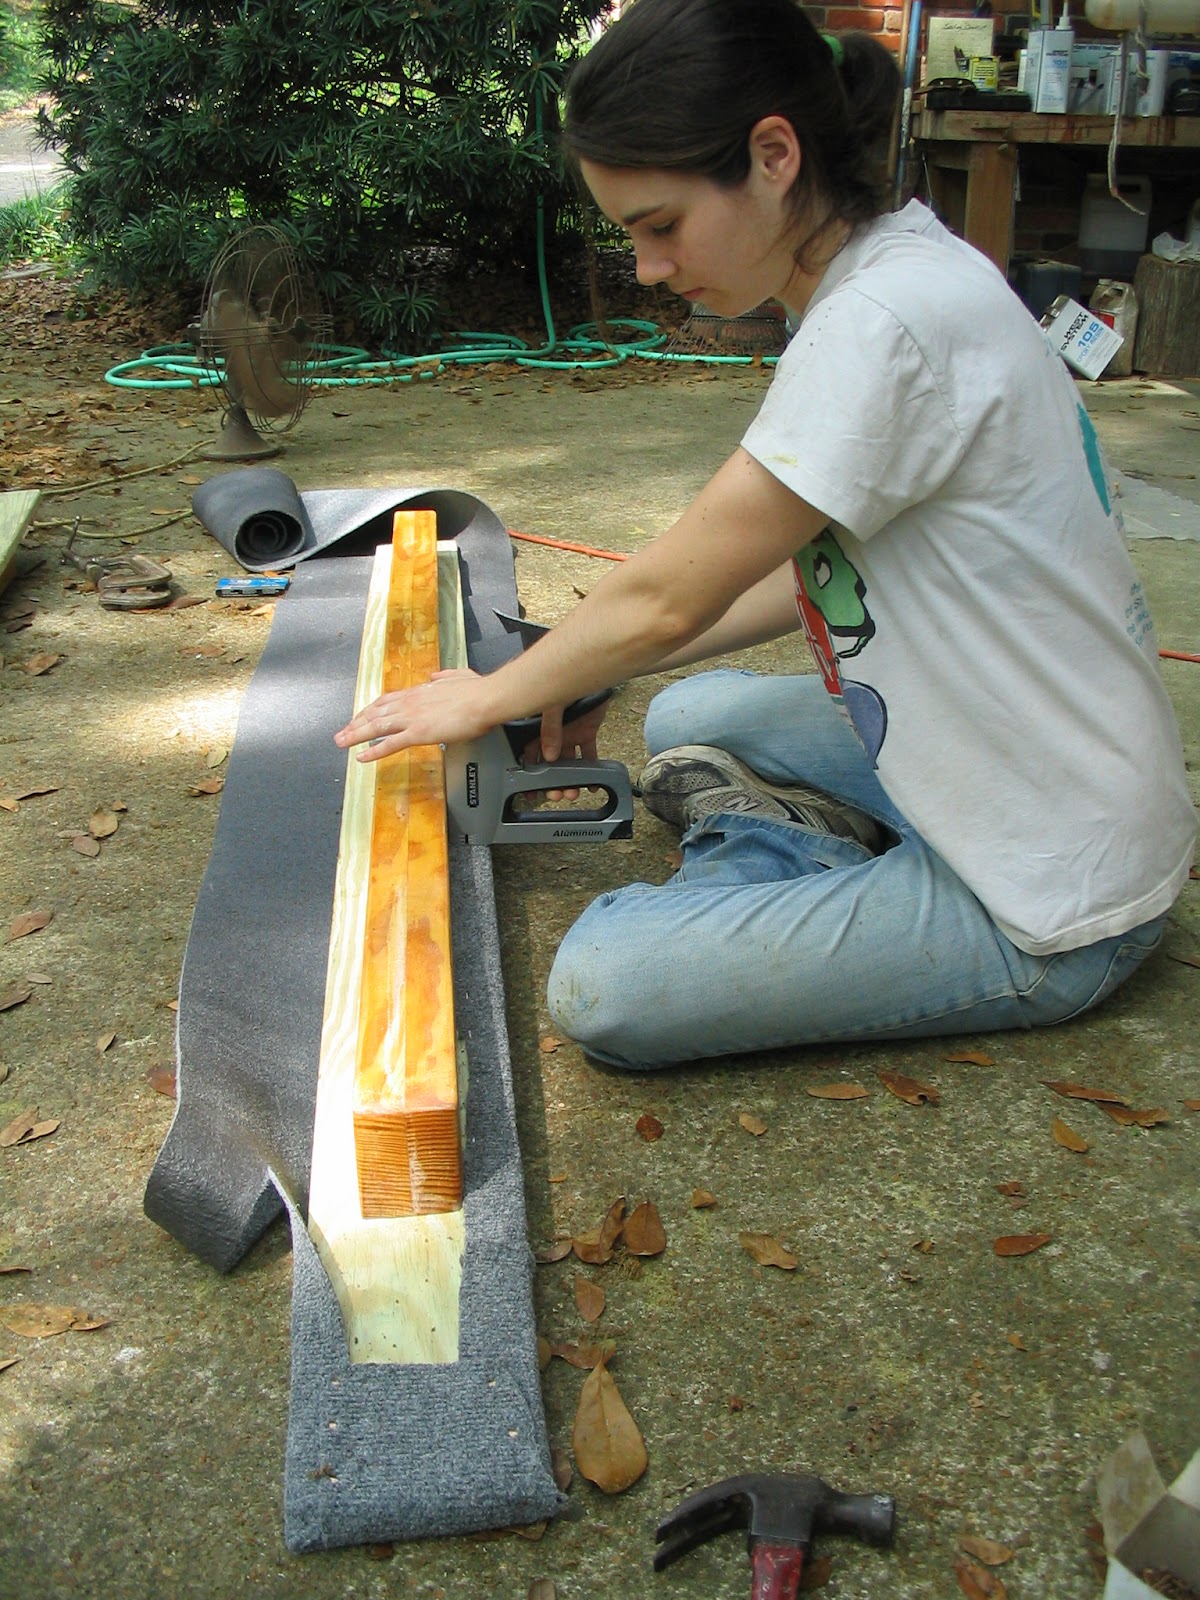
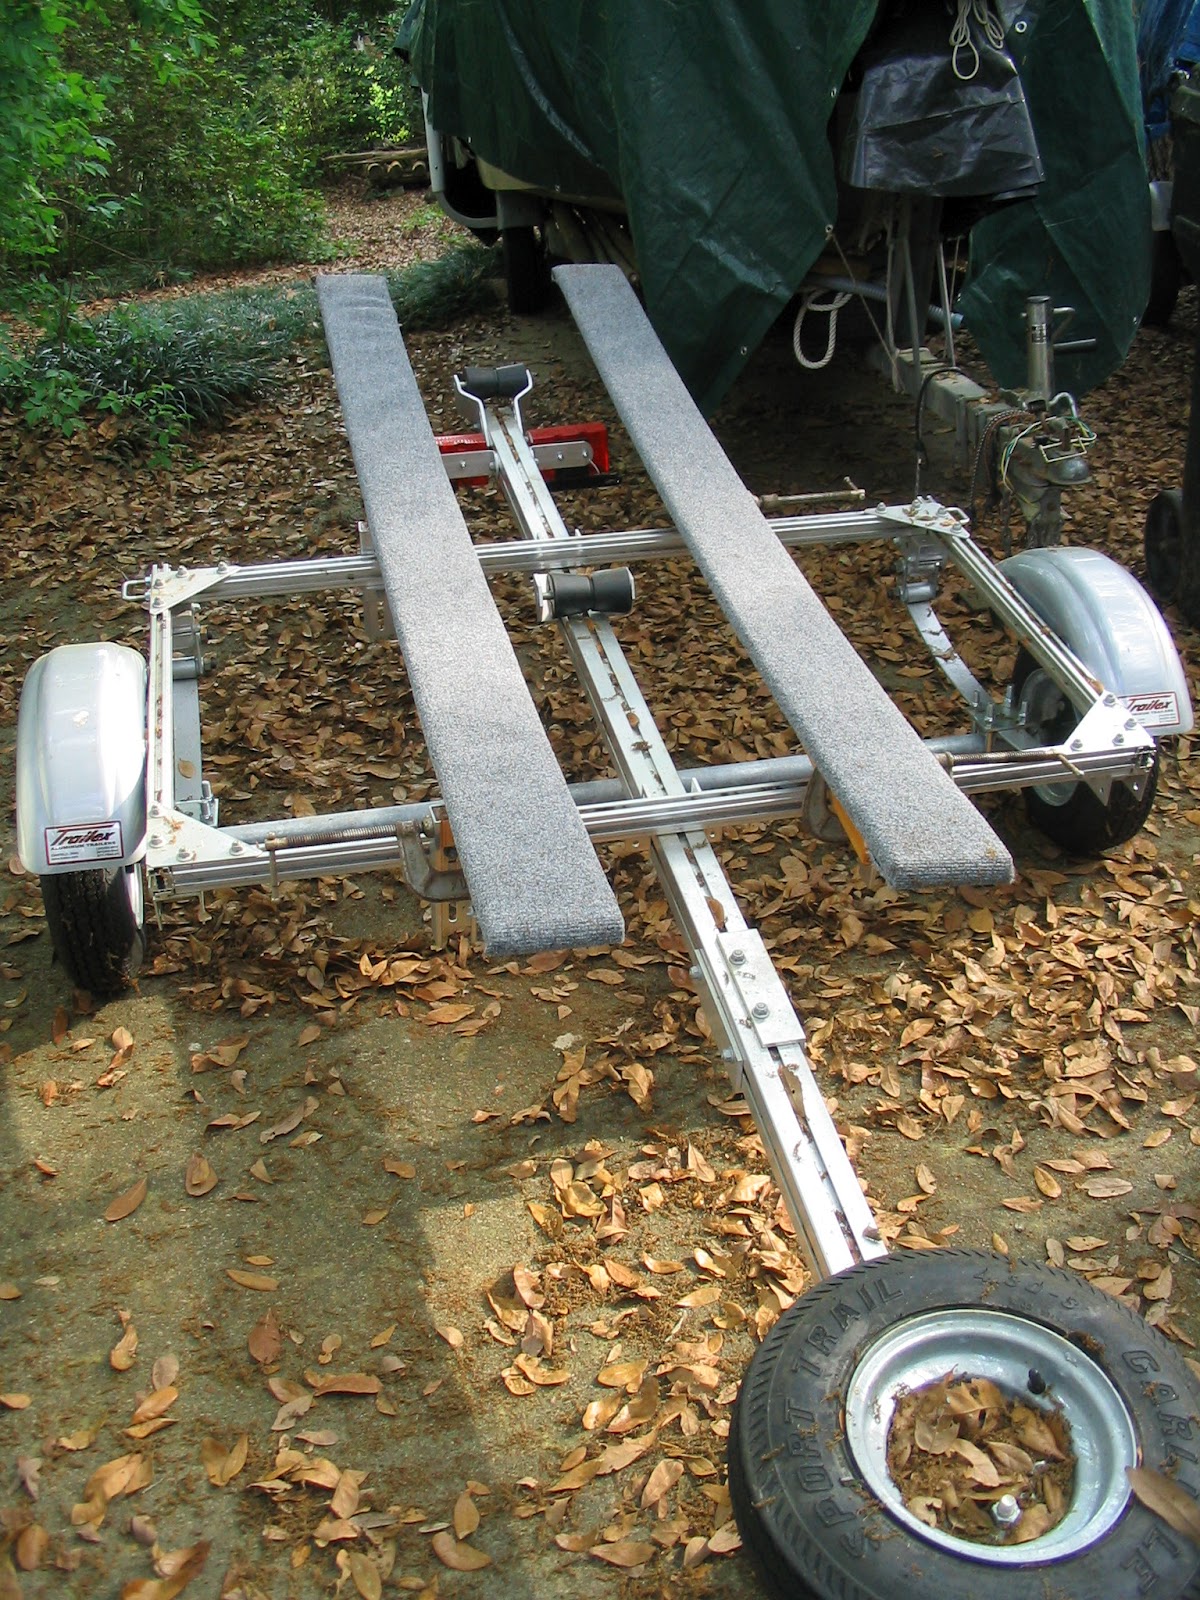
We also worked on the trailer bunks.  After screwing one almost all the way down, I realized that I wasn't able to put enough weight down on the top of the bunk to close the gap between the bunk and the runners it is supposed to rest on.  Daddy tried standing on it while we screwed it down, but even then it wasn't closing all the way, so we tried a couple clamps.  That did the trick.


Then we put the carpeting on.  Lots of staples along the edges as we pulled it tight, and nails at the ends where the carpeting overlapped and was thick.


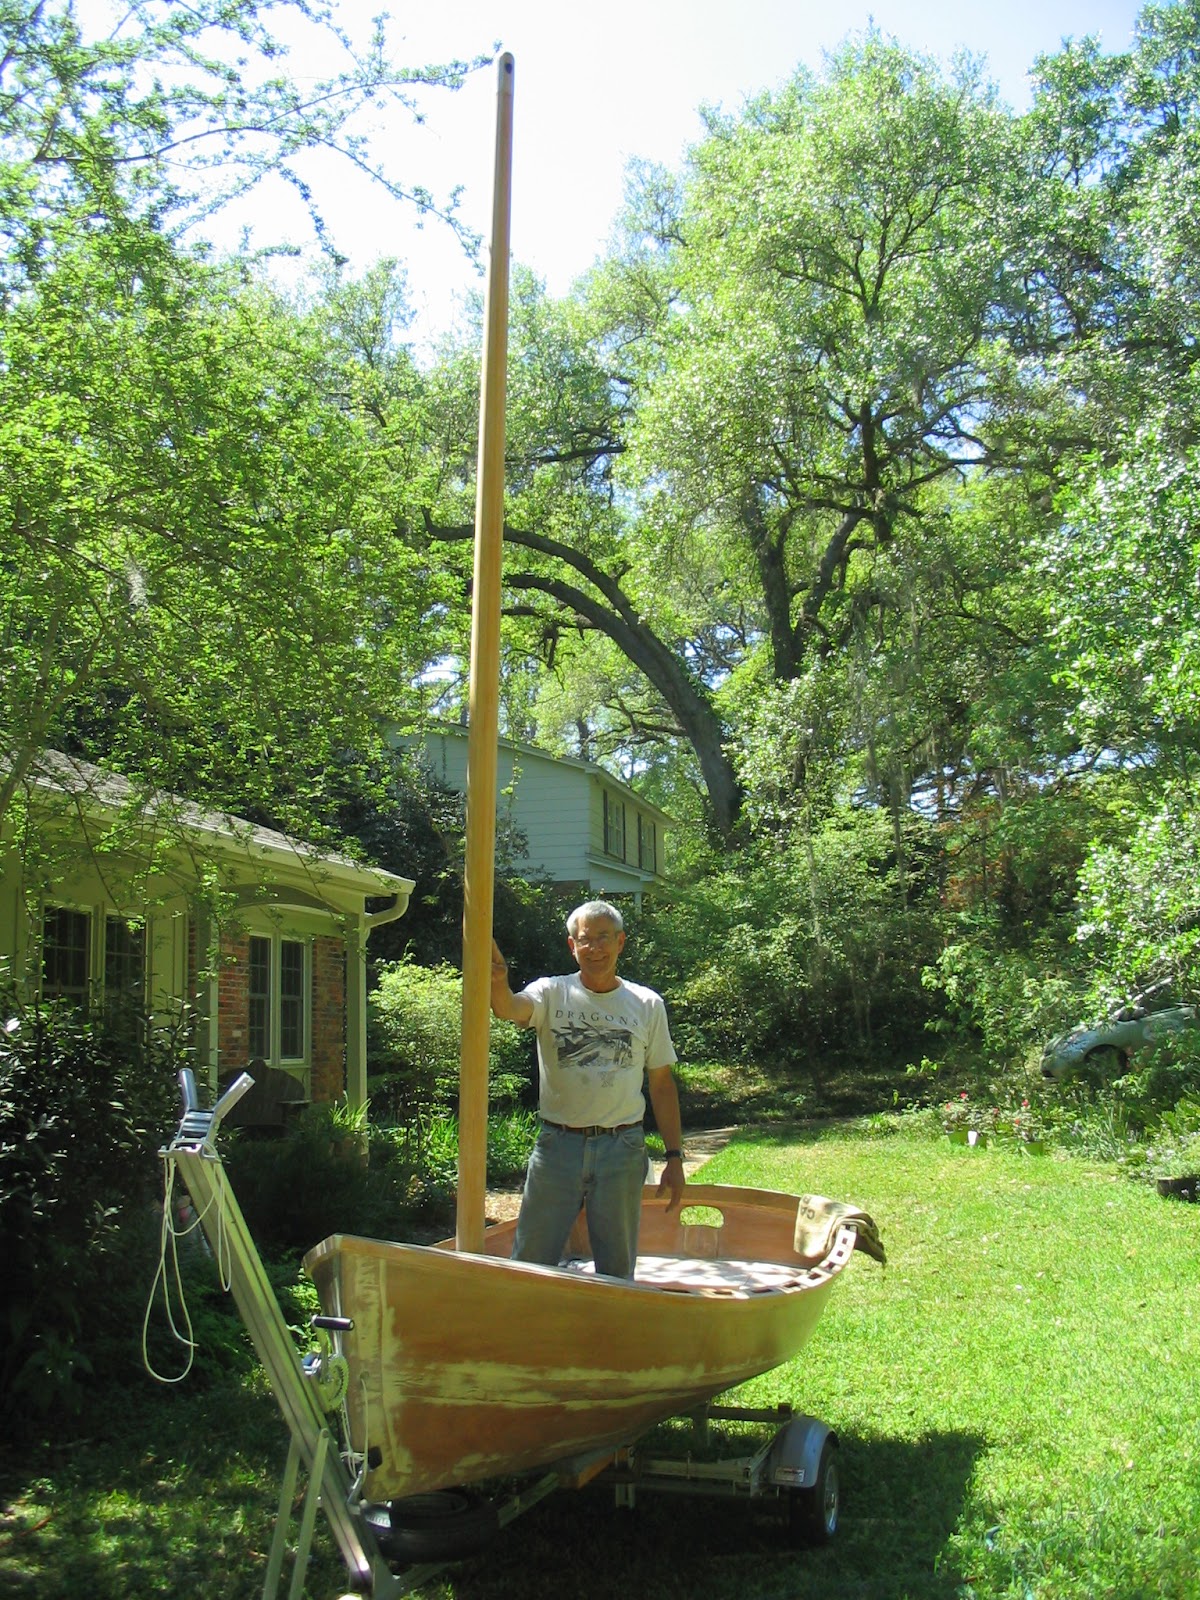
Now we're ready to get the boat back on the trailer and see how the mast works in the new slot we drilled for it in the deck.
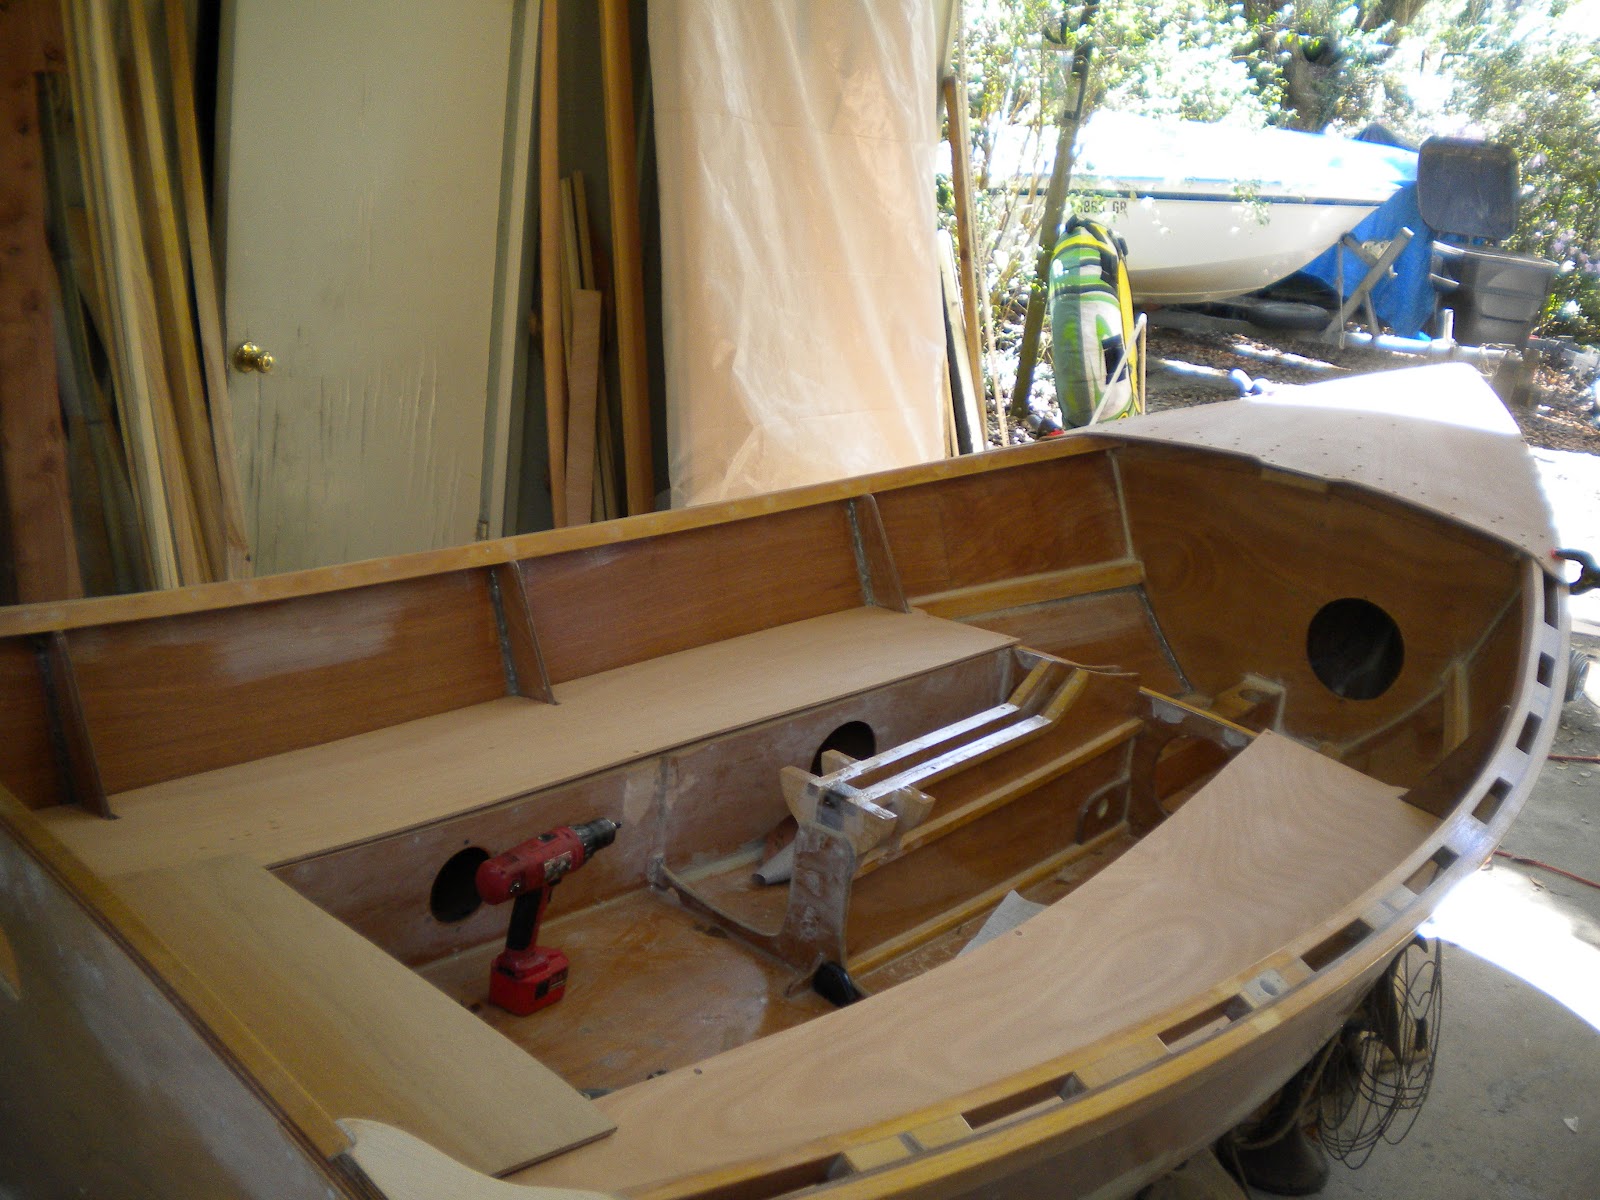
Daddy also spent a lot of today while I was gone sanding and putting in more fillets along seat edges and seat sides and the bottom of the boat and glued the drain hole into the transom.  Right now as I take a break from the mosquitoes, he is out there routing the seats.  Wait...here's a photo:

(Note those nice brown fillets in the background!) 

Friday, March 16, 2012

Color Poll.

Above you will notice a poll.  My dad and I have different opinions on gunnel colors, and I just wanted to get more opinions to make the decision even harder!  But hopefully it will help!

Here are links to see the colors:
Interlux   Under "Select Type" menu, chose Finishes.  Click on Brightside Polyurethane.  Scroll over the colors to see the names.
Pettit  Scroll down to the second page, at the top under "Topside" heading, the Easypoxy colors each have their name underneath.

Also consider the other colors of our boat, both from Interlux.  The hull will be Bristol Beige and the cockpit/seats/(deck maybe) will be Hatteras Off-White, Y4208.

Please take a look at the potential colors and let us know what strikes your fancy!  Feel free to comment with ideas, reasoning, etc.  It's exciting to have readers from all over the world - we'd like to hear from you!

The poll is scheduled to end in about two weeks, so get your votes in!   

3-16, and a lost and found.

This evening we drilled a hole in the foredeck for the mast.  It will have to be readjusted and shaped to properly hold the mast.  First we have to finish the trailer so we can get the boat back up there and put the mast up and down (too tall for the carport).  


 The hole saw wasn't quite deep enough to cut all the way through, so we had to go back with the sharp little knife to cut out the circle.


The plans actually call for a hole sort of like this for the mast to go through (not so close to the edge of the deck).  We did some practical redesigning to make rigging easier.  The hardest part of raising the mast when you have to get it through a hole is lifting it straight up the extra 2-3 feet to get the bottom through the hole in the deck - it is a tall, unwieldy lance.  So we decided to cut out the hole, open to the back so that the mast can be set into the mast step down below and then just pushed up to fit into the opening and lashed into place.  


Also preparing to finish the seats. 


These are some old pictures that I found and realized I had missed putting them up.  This was gluing the lug together.  You can see the plugs inside the long pieces of wood (where the patches of glue are); besides either end and where the lug will meet the mast, the lug is hollow.


We tied it together with copper wire and zip ties (because we were running out of wire).  The zip ties worked ok, but we couldn't tighten them nearly as well as the wire - everything is slippery with epoxy and the zip ties are difficult to grab and pull really tight around a square, whereas the wire can be twisted and tightened with pliers (careful not to break it though)!


Tuesday, March 13, 2012

3-11.

Foredeck and seats are glued.  We just have the final aft seat compartment left to attach - it will be hinged to make a little storage compartment for a bailer, sponge, extra gear, etc.

Daddy and I screwed the deck down and nailed the starboard seat down last week, and then this weekend while he was out on a sailing adventure, I nailed down the port seat.  I learned from our mistakes on the first seat and the port seat is superb - only one small gap in epoxy between the seat and seat supports.  (On the starboard side we ended up with lots of little gaps and cracks - the seat wasn't held down well enough by the nails as the glue dried - so we'll have to go back and fill those in.)

Making use of left over glue as usual, I also filled all the screw holes and covered all the countersunk nail heads.  Then I also put fillets in on the starboard seat, and of course I made too much glue, so I quickly sanded along a frame inside the cockpit and put some fillets there before the glue was getting too tacky to maneuver.  Filleting is tedious and takes a lot of patience because you are trying to get the glue to form a perfect curve with the tip of a plastic stick, while also not leaving behind a huge mess on either side which would require more hours of sanding to clean up later.  I am finally perfecting my filleting technique, learning how to use the curved end of the stick to evenly spread and smooth the glue and the square end of the stick to scrape up edges, while keeping a rag at hand to constantly wipe the stick clean and then finish cleaning the edges of the fillet.


Now there is lots of sanding happening.  Started this weekend and will continue through the week until there are no more apparent spots of epoxy showing.  Only then can we proceed and put the next coat of liquid down, followed by another sanding, another coat of epoxy, until we have 3 coats applied.  


Tuesday, March 6, 2012

3-6.


Some pennant brainstorms - background color is just made up, but would theoretically match/coordinate with the gunnel color, which is not yet definite.  We are thinking of a teal color, but it could still end up blue.  


Flying or swimming trumpeter swans - Trish, any input about sewing - too difficult, too many seams, etc? (The swimming swan would just be the swan and background, I got lazy with paint and didn't crop out the water because I probably made 10 of these).  I'm thinking the swan would just be a simple cut-out of flying or swimming shape - nothing detailed. 


Or if she's Cygne, French colors to grace the mast.  (My dad thinks this would have too many seams and would be too heavy to fly well). 


Today Shadowfax and I went to West Marine for supplies, and came home ready for sailing!  Shadow wags her tail when she sees her PFD already.  We went to the beach yesterday and had a blast in the waves (well she did, the water is still too cold for most humans).  I think she'll be a boat dog!


We picked up paint today - 2 quarts of primer and 1 quart of Hatteras Off-White 1-part polyurethane for the cockpit.  Ordered Bristol Beige for the hull; it should be here Thursday, although we won't be ready for painting that soon!

After shopping, I sanded the deck and seat undersides and put on last coats of liquid epoxy.  Yesterday Daddy had cut out the last piece of seat - for the compartment - and had put on coats of epoxy, so we were ready to glue today.  And we glued and screwed the foredeck down.

And I forgot that we actually have one more construction project - it will be important to build the boom.  We have our lumber cut for the boom, just have to glue it together and then plane it to shape.  Tomorrow will most likely be spent gluing the seats down.  

Sunday, March 4, 2012

March

The last of the construction projects.  

We cut out the foredeck last week and Daddy made doublers out of cypress to go under the deck where it overhangs in the boat (one for either side of the king plank).  The oak king plank is also set to go under the deck, and today we pre-drilled and dry fitted the king plank and deck.  


Today we also cut out the seats.  We had cardboard cut-outs for port and starboard seats and the deck that we traced onto the plywood.  The cardboard cut-outs being far from perfectly shaped, we then had to go back and forth from boat to saw, trimming off edges, widening notches, etc until the parts fit right.


Everything is coming together nicely.  The deck and seats are ready to be glued, although we will wait to glue the seats until we have finished the stern seat compartment that will hinge open - that is just a rectangular piece of seat with hinges at the back and a latch at the front for a little storage compartment.  This will have to fit in with the side seats, so we'll make sure it all goes together before gluing.  In the meantime, these new pieces of wood have to get their coats of liquid epoxy on surfaces that will be out of reach once glued, which we'll be working on this week as the weather is warming again after the downpour and cool air we had yesterday.