Tuesday, February 7, 2012

3-juniper-1,2-pine-cyclooctane-MAST

I think the title of this post counts as studying for organic chemistry tonight... 
Our mast is an octagon at the moment, created by Walt Donaldson, woodworker, boatbuilder extraordinaire.  And, it is hollow - meaning lightweight for girls to lift and rig their own boats.  We spent Monday afternoon putting it together.  Walt had already cut the pieces - they are shaped so that they roll up and fit tightly together, with a hollow space in the middle (this is apparent at the end).  They are also tapered, so the mast is wider at the base and narrower at the top.  And at the base, in the photo below, you can see the juniper added to the long pine pieces that adds a core to strengthen the base.  


To start, we had to put tape under the wood at intervals and space each piece just a little bit apart (otherwise they wouldn't roll up if they were already touching).  We did a dry run test to make sure everything worked when we rolled the mast up into its octagon shape and to practice not getting the tape stuck in any cracks in the wood.


Then we started epoxying.  We just used liquid, which is way easier to deal with than glue, trying to get it in all the cracks.  I went first with a roller putting epoxy down.  Then Walt and my dad followed with squeegees and brushes to push and smooth the epoxy down onto the edges of the wood.  We went over the whole mast about three times until we were sure that all the wood had been coated and had absorbed the liquid - no dry spots, lots of epoxy everywhere, including on very slippery gloves!
Next we rolled up the mast, fastened the tape we had put down earlier to hold the wood together temporarily, and worked the pieces together so they were fitting right.


To actually hold the mast together while it dried, tape would not suffice.  So we wrapped the mast in 80 lb fishing line about 4 times - two passes up and two passes down.  Above, Walt got two strands of fishing line ready.  He went ahead to remove tape as Daddy and I took the line and started wrapping.


Each of us went up the mast, then back down, pulling the line as tight as possible without breaking it (this line was made for catching pretty good sized fish, I think it's what I needed when I caught the elusive monster pike on C-3 pool at Seney that no one but Miriam believes because it broke my line 3 separate times).  Anyway, back to the mast - once we finished wrapping the mast up, Walt tied off the line at the bottom on a few nails and then we took a little time to straighten all the wood up so the mast would dry in a straight fashion.


And at the top, you can see the hollow hole.  There will actually be a plug at the top for strength and to keep stuff out - don't want a seagull to perch and poop down the hole, or water to get in for that matter.

Now that we have a mast and a lug, we just need to make the boom.  (There's still lots of work to do on the mast, but at least the first few steps of progress have been taken).  Also we heard from the sailmaker - Mr. Stuart Hopkins at Dabbler Sails - and it sounds like we are up next.  And, Daddy, Shadowfax, and I took a trip to the beach at Panama City last week to look at boat trailers - we ordered a Trailex at Sunjammers that should be here soon - we'll be assembling it!

2-5.

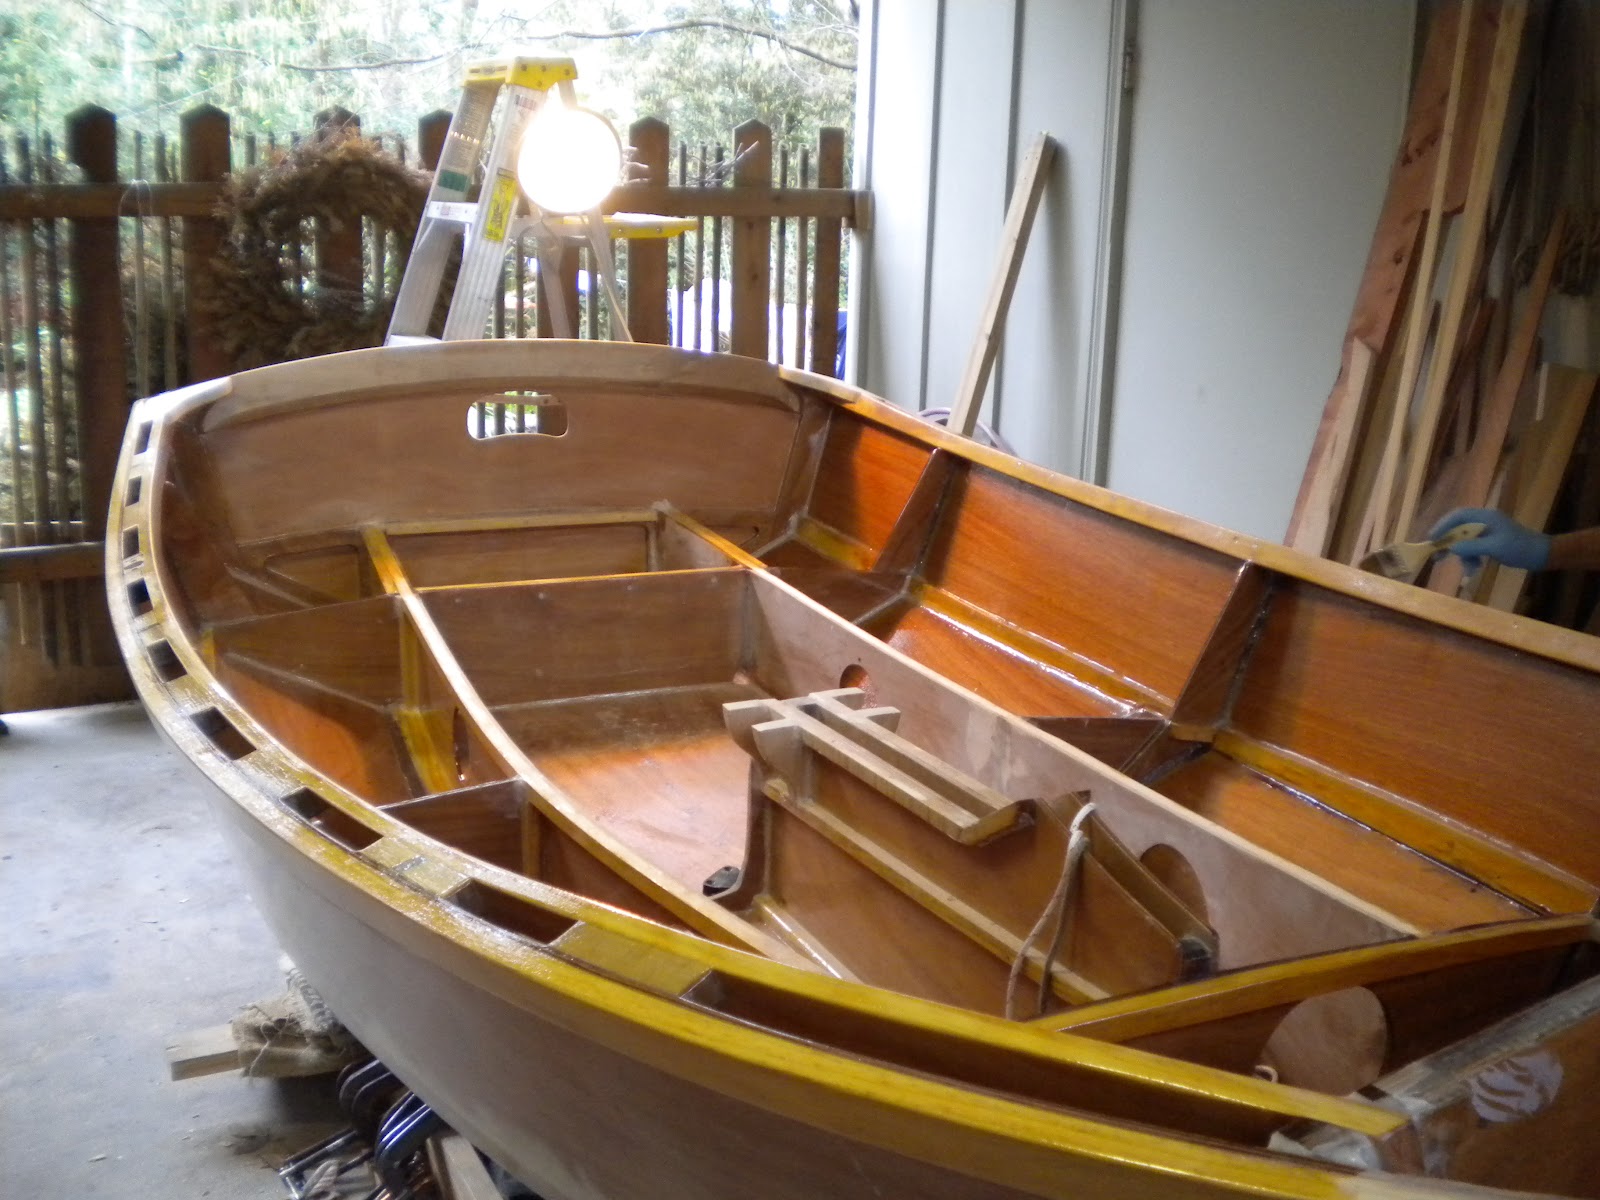
Last week and this weekend we worked on the gunnels.  Daddy had already sanded and put a first coat of epoxy on the starboard side during the week, so we sanded that again and put a second coat on while we did the port side, too.  


First we drilled out the holes for oarlocks in a block of maple on each side.  Used the old fashioned drill - which I was pretty useless at because with the height of the boat I couldn't put enough downward pressure on the drill for it to bite.  We finished off the hole with the modern drill, and drilled holes for screws, too.  Later these were filled with epoxy glue, then we'll re-drill so no wood is exposed.


The most intense part of Sunday was the sanding.  I sanded the maple blocks and gunnels flush.  Then we went along and sanded every corner of each maple block so they aren't sharp edges.  This worked well using a strip of sand paper from an old belt.
Besides this, we also had to do more sanding on the inside of the boat - removing drips from past coats of epoxy that we missed when cleaning up, some uneven globs around fillets and in corners, etc.  Basically everywhere that will be visible (not covered with a seat or deck) has to be sanded perfectly smooth because any old drips show up really well under a new coat of epoxy, and apparently they'll show up under paint!


Once we were sick of sanding and decided we didn't mind having minor flaws in the finish of the boat (really who is going to notice, or mind?) we went ahead and epoxied the whole thing again - gunnels and inside panels.  I think this was the last coat for inside the seat compartments, so now we'll be working on putting the seats in, soon-ish.


Then, with warm February weather, we put the mast together - see next post!

Tuesday, January 31, 2012

1-30.

I am supposed to be studying physics, but alas, this is way more fun than physics, so I had to do a short post tonight.  
Yesterday we did a bunch of sanding, then glued on the inner gunnels.  We ran out of clamps partway through (oops) because our smaller clamps weren't big enough to span the gap, but we survived by adding more screws.  We also put the quarter knees on.  


We tried to be very clean with the glue and wipe up all the mess because it is going to be really hard to sand beneath and in between the inner gunnel and the side of the boat.

Daddy had also cut doublers for the stern seat compartment and we glued those on.


Sunday, January 29, 2012

1-29.

A shot of the boat up on the cement blocks so we could work on the centerboard - you can see it down below.  


Today we had to level up the boat to work on the kingplank.  It took lots of wood under the stern!  Finally we got it mostly level and were able to hang a string and needle though a pilot hole in the kingplank, right in the center of the circle that will be the circumference of the mast.  This is so that when the mast is up, it will be vertical, instead of standing at some weird angle.  We found the center of the circle with a compass, so it is kind of accurate - as accurate as we're able to find.  We also marked the center of the hole in the mast step, accounting for the side of the circle that has been cut off.  Then we aligned the tip of the needle with the point on the mast step by shifting the kingplank around.  Once we had it centered, we marked where the kingplank was on frame 1 (under the plank in photo) and up at the bow.


Then it was time to cut out notches in frame 1 and in the kingplank to fit it down into the bow so that the deck will go over it.  Used a combination of the jigsaw and the hacksaw (to go through nails/screws).


 We cut out the notch in the kingplank with the circular saw and jigsaw.  We had to gradually cut it out to fit it into the bow properly, cutting off a bit more wood in certain areas each time we set it in the bow.  Finally we had it sitting in the bow nicely, with a little wiggle room in frame one, which was good since we had to realign the needle with the center of the mast step.


We also got the quarter knees predrilled.  I am really good at stripping out screw heads... and I did it again on the port quarter knee.  We had to pull the quarter knee out away from the boat enough to get the hacksaw between the knee and the transom to cut the screw.  Then I pulled the tip of the screw out of the hole in the quarter knee with the vice grip and my dad pushed and hammered the other end of the screw out of the transom with the vice.  Fortunately no damage done, whew!

Then we also put the inner gunnels in and marked where the quarter knees overlap them, so that we could notch out the gunnels.  I chiseled out the inner gunnel notches, and now they're ready to be sanded to fit better with the quarter knees.

Monday, January 23, 2012

1-23.

Putting on the outer gunnels.  


Once the outer gunnels are nice and dry, we can attach the inner gunnels!  We've been having nice warm weather for epoxying, so we're doing as much as we can.  Saturday we glued together the lug - one end of it is shown below.  Daddy had already cut the wood - 4 pieces with angles so that they fit together with a hollow inside square.  He saved the pieces cut off that would fit into the middle to use as plugs for each end and for the area where the lug meets the mast.  You can see in the end here how the pieces went back inside when we glued it all together.

Today we routed the edges of the lug to make it rounded, except along the strip that will be going up and down the mast.  Then I gave it a fine sanding so it's ready for a clear coat of epoxy.


After we had the lug ready, we did a bend test on it.  This is for the sailmaker to determine a more exact fitting of the sail depending on the properties of an individual piece of equipment.  Based on the size of the sail (our plans call for a 80 sq ft area), you hang a corresponding weight from the lug, then measure at 3 points along the lug the distance from a string strung straight across down to the lug.  It is scary tying ~3 gallons of water to a piece of hollow wood (well it was tied to the area with a plug) that you just spent a lot of time creating.  You really hope it doesn't break in half!  But no worries, it is very strong!!
Next we get to build the boom!


After I left, I think my dad also put clear coats of epoxy on the lug, the centerboard seat, and the tiller extension.  We had drilled holes in the centerboard seat to plug with maple dust epoxy, that will then be drilled through again to put bolts through to attach the seat to the centerboard.  We won't actually glue the seat on so that in the future the seat can be taken off and the centerboard accessed and removed if needed.

Wednesday, January 18, 2012

1-15.

Lots of little things getting done.  


Glued in the centerboard seat supports (you can see here the back two didn't have a way to attach while the glue set, so Daddy made wood clamps that are just pushing the bottoms of the supports in place.


We experimented with using the router on scrap wood first, learning how to start and stop at a desired point.  It is pretty easy to use, so I went around the edges of the centerboard seat to round the top edges.  The router throws out a lot of saw dust!  And it does a really good job!


A back seat will go from the transom to this last frame that Daddy is cutting.  The last frame and the transom doubler have curved tops, and we want to make a compartment here that can hinge open and close for extra storage.  It'll be easier to construct (or even possible) with the tops of these flat.  So Daddy cut off the frame as much as possible with the power saw, and where the power saw can't reach, the Japanese hand saw can!   I think we'll have to chisel out the transom doubler, though, not even the Japanese saw is up for that task.


Plus lots of sanding, filleting, making a tiller extension of red cedar, and Daddy and Timothy raised the boat up on blocks so that the centerboard can be fiddled with - it's in place and we can raise and lower it.

Tuesday, January 10, 2012

1-9.

We were planning on making a trip to Panama City to look at trailers, but decided to postpone it for worse weather and use the nice warm days we're having now to do some epoxy work.  

This weekend we took off the inner and outer gunnels and the seat supports and gave them all a coating of liquid epoxy.  While the gunnels were off, we glued and screwed the spacer blocks.  Those were screwed from the outside of the boat, meaning we had to do them first before the outer gunnel went on.  The next step is to glue the outer gunnel on because it's screwed on from the inside (so the inner gunnel would be in the way), then lastly we can attach the inner gunnel.   


We also glued and screwed the seat supports (little 20x20mm) strips that run along the inside of the frames that the seats will sit on.  These aren't a perfect fit yet, so now we'll have to go back and sand them flush with the frames.  We also added some fillets (the brown epoxy below) to certain seams.  This one is inside a seat compartment - we want the edge where the stringer of wood is to be smooth when your hand is reached inside, and to help keep water from pooling behind that wood where it would be harder to get out.


A quarter knee.  My dad designed them and cut out the basic shape, then I went back yesterday and cut out the notch where it fits with the transom board and sanded them to fit inside the back corners.  Getting them to actually fit into the corners was tricky, and on this one you can see there are gaps around the notch, but that'll have to be filled with maple-dust epoxy.  The second one turned out to be a closer fit - I was more careful with the sander!  We're hoping to varnish these, along with the curly maple top transom doubler and the centerboard case seat/rowing seat.  


Daddy used a cutting wheel on the angle grinder to cut a piece of pipe for the centerboard to pivot on.  After he cut it, it was still a little too long, so he had to go back and grind it down more, and eventually it fit perfectly.  A bolt goes inside the pipe and sticks out either side of the centerboard case to hold the pipe in place and keep water from leaking inside the boat.  This also allows the centerboard to be removable for repairs, etc.


We also drilled extra big holes in the transom and filled them with epoxy for the rudder gudgeons (or pintels, one or the other).  Now we can go back and re-drill through the epoxy to actually attach them - that way there's no water to wood contact.  (Just like most of the other holes we've been drilling - see the centerboard where the pipe is going through.)

We decided on our sail color and type - it's being made by Dabbler Sails up in Virginia.  Earlier I said it was going to be Egyptian cotton, but I was wrong - it's Egyptian dacron.  The sailmaker sent us several samples and we picked the Bainbridge type (UK) because it was softer and more pliable.  The pennant is going to be a nice sea blue color.
With that in mind we have also picked out boat colors (I think)!  We talked with Brian to get artistic input, and came out with a complex paint scheme that my dad and I narrowed down to reduce colors and detailed work.  Sounds like it'll be a dark-ish beige hull with blue trim to complement the pennant color on the gunnels (and possibly below the gunnels to a little wood strip line), and creamy off-white interior and foredeck.  I would like to also paint the inside of the transom the darker hull color to off-set with the light curly maple, but we'll see what resistance my dad puts up to that.
There are also some names floating around: Au-delà (beyond), L'étoile de mer (starfish), Swan (for the curly maple from Trumpeter swan country), Cygne
Input anyone?! Suggestions?!