Wednesday, June 13, 2012

6-13.

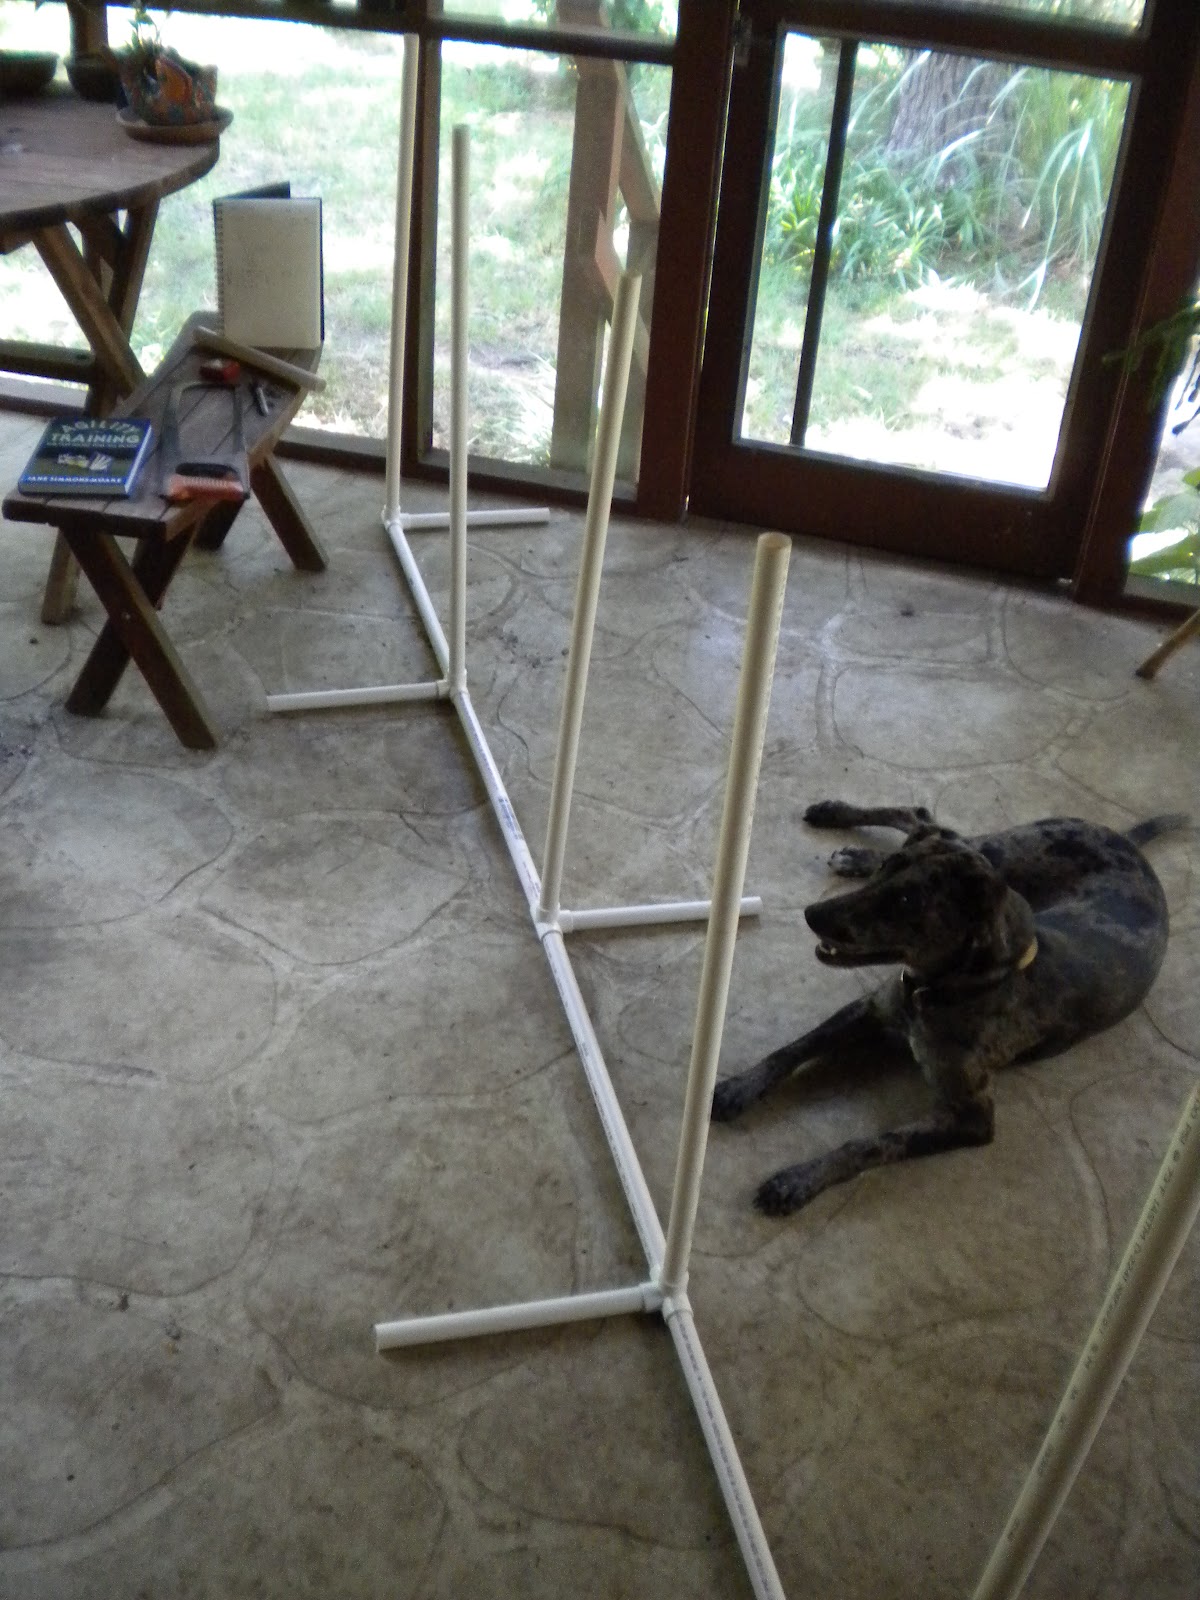
While we're waiting for paint coats to go on and dry, I took an afternoon to build Shadowfax a set of weave poles.  With obedience training going well, I decided she's ready for more fun.  She supervised construction and here she is checking out the finished product.  These are bigger than a standard set, but should be better for learning.  We've already started training - she's going to catch on fast. 


Next on the list of things to build is a pause table (she knows the command 'table,' but she's left a couple scratches on a table in the house, so I think it's time she got her own official table).  Then when the boat is finished I will have the time and tools to start on more detailed construction projects of see-saws, A-frames, cross-overs, and jumps (and have time for training of course)!

Depending on weather, we should be able to put the 4th coat of paint on the hull this weekend.  While sanding the 2nd coat, we were getting down to primer in spots, so we will have to go to a finer grit sand paper.  Today Daddy told me that the 3rd coat we put on Monday looks really nice now!  We should run out of Bristol Beige (hull color) after the 4th coat, so we'll flip her over and start on the insides after that. 

Monday, June 4, 2012

End of May

Don't know if I mentioned this in an earlier post, but I just came across the pictures of it.  Before we flipped the boat to start painting, we decided to add a block of maple on the end of the centerboard case to attach the mainsheet pulley to.  This is a deviation from the way the rigging is called for in the plans, so we'll see how it works!  It should hopefully simplify things and get ropes out of the way, plus I will be more accustomed to it since it is very similar to the way the Blue Tang is rigged.  


We have an advanced system of varnishing and painting parts to avoid runs and imperfections from drying on a surface.  It uses pieces of flexible scrap wire and a ladder, and it works surprisingly well (once you figure out how to hang the piece you've just painted most of without it touching anything in the process and then how to paint the remainder of the piece while it hangs and wants to swing back and forth)!


And we have put the first coat of colored paint on the hull!  My dad's out of town now, so we've paused for the next coat (we'll probably do three coats).  The paint dries very fast while we're working, so it takes two of us to roll and smooth to keep a wet line and a good-looking finished product.  Fortunately the hull is a pretty straight forward surface.  It will be more challenging with all the corners and different surfaces in the interior!


Sunday, May 20, 2012

5-20.

Finished the trailer modifications today.  We made these side supports to keep the boat from tipping sideways off the trailer since the bottom of the boat is so much narrower than the outside gunnels.  These will just stabilize the boat when it is tied down on the trailer. 


Then we loaded up the boat and rolled her out to the front yard again.  We slid it off onto the grass and rolled it over onto cement blocks to wash the amine blush off.  The boat is heavy, but I am able to tip it up on its side by myself - it's just like a big, unwieldy canoe.


After it was rolled over we got a good view of the undersides of the gunnels for the first time.  I didn't take a before pic, but there were a few places where we hadn't clamped the gunnels while the epoxy was hardening and there were tiny air holes between the side of the boat and the gunnels.  So we mixed up some liquid epoxy and poured that into the gaps, then filled with solid.


While the epoxy was hardening, we went ahead and finished painting the trailer side supports, sanded the rudder and rudder stock for another coat of varnish, and sanded and primed the lid of the aft seat compartment.
Earlier in the week, Daddy had put another coat of varnish on everything and put the first coat of paint of the bottom of the mast.  The top foot or so will also be painted white, along with the end of the lug (a traditional look).


He also primed the centerboard earlier this week, and on the blocks is the newly primed seat lid.


In the front yard, we washed the hull with water and scrubbers, then rolled it back into the carport.  We flipped it over outside, then Mom helped us carry it back onto the blocks.  We sanded the hull and gunnels, then I vacuumed and blew and dusted really well.


And we painted!  I rolled and Daddy followed to tip it out with a foam brush.  The paint was drying really fast, so we had a hard time keeping a wet line, and the first coat is not too attractive, but it is the first coat and will be sanded and our techniques will be perfected.


Now it looks like a real boat.


The first intruder on the fresh coat of paint.  Bugs are weirdly attracted to wet epoxy and paint.


Thursday, May 10, 2012

5-9.

Since the last post, we've been working on small projects and continuing to add coats of varnish to everything that needs it.  I made a spare belay pin that is longer - should be easier to work with, and I'll have an extra if one should break.  Daddy's been working on trailer modification - we ordered two more pieces to build supports on for the sides of the boat.  Below is just the aluminum piece attached to the trailer frame.  


This is an idea of what the support will actually look like, but it might be two layers of wood thick for extra strength, and it will be carpeted.


I also finally got a hitch on my car.  The guys that put it on knew that I had lived up north because the underside of my car is riddled with rust (after only 1.5 winters)!  They almost weren't able to bolt the hitch on because the holes where the bolts go were really rusted - but they said it should hold fine since they were able to attach it.

We also decided to get rid of the toe stubber at the aft end of the centerboard case.  Daddy cut it off and epoxied over the raw wood on the bottom, so that'll have to be smoothed out now.  In its place will go a block of maple that the mainsheet pulley will be attached to.  And we won't have to worry about a silly decorative toe stubber in the cockpit.  

Monday, April 30, 2012

4-30.

This weekend we finished epoxying the boat.  Sunday we finished sanding, then put down a coat of liquid on the inner surfaces - floor, seat sides and tops, sides, transom, deck, centerboard case... 
It's starting to feel like summer here, getting warm in the afternoons, and the first batch of epoxy we mixed up was too large and it started hardening in the roller pan before we we could get it out and rolled onto the wood. My dad had to run to Lowe's to buy more roller covers and a new roller pan (we obviously weren't prepared) while I tried to salvage what we had done with a brush.  When he got back we finished the first coat successfully by mixing epoxy in small batches and pouring it directly onto the surfaces to paint, using them as roller pans - by spreading out the epoxy it slows the hardening process.  Meanwhile the original roller pan with all the hardening epoxy in it was steaming in the trash can, about to spontaneously combust!  

Then we waited for the first coat to get tacky so we could add a second coat.  We thought it was at the perfect stage when we started adding the second coat, but some places had already hardened!  We were able to recoat most of the boat, though, which was good because it meant we didn't have to sand the entire thing between coats.  


Today we sanded the surfaces that needed a third coat (deck, floors, and seats).  Then we applied a third coat on the floors and seat tops first - adding no-skid after painting them smooth - so feet will have some traction in the boat.  When we were finished shaking on the no-skid, we coated the seat sides and deck, being careful not to get the no-skid stuff on the roller so we wouldn't contaminate surfaces that should be smooth.

Tomorrow will be spent varnishing mast, lug, boom, and all the rudder/tiller parts.  

Monday, April 23, 2012

4-23.

Who knows where the boat will be in 50 years, so we will epoxy over this message in the stern compartment for history. 


In preparation for final coats of epoxy (we're having to basically start over on 3 coats for the entire interior because we've sanded lots of spots down to bare wood while trying to sand drips and runs), Daddy cleaned the whole carport and disassembled the strongback.  It's too bad we hadn't thought about taking that apart earlier as we kept tripping over it, but now it is finally gone.  The boat has been all sanded down and is ready for epoxy, but it was too cold today, so we'll wait till the weather warms up.  In the meantime, we sanded the mast, boom, and lug and will apply another coat of varnish.  Along with the tiller, tiller extension, and centerboard seat cap.


Soaking the parrel beads in oil.  I forget which type of oil, might be flaxseed or linseed.


I whipped the halyard today.  Daddy taught me how to start the waxy thread with a loop, then wrap it around the end of the rope really tightly to the end, then pull the end back through the loop and the loop down under the wrapping.


Our ropes are now "respectable," and able to be used in the company of upstanding sailors.    

Wednesday, April 18, 2012

4-17.

 The maple belay pin for the halyard.


Before:  Tiller, rudder stock, rudder. 


After: (Special clear epoxy)  We sanded off the fiberglass from the rudder stock because it was too ugly showing through, so we had to start over epoxying before we can move on to varnishing.  Everything else is ready for varnish, though, and the mast, lug, and boom (to the right) have already had two coats of varnish with a third to be added tomorrow.  


I made two pins for the tiller, one as a spare in case the other one breaks or is lost at sea.  This holds the tiller into the top slot of the rudder stock so the tiller doesn't just slip out into the boat.  Also just beside the tiller in the photo is the tiller extension, which we attached and tested while sitting in the boat.  It's going to be  really nice to have this - can be sitting far forward or out on a gunnel and still steer.