Thursday, November 17, 2011

11-17.

Redesigned the rudder.

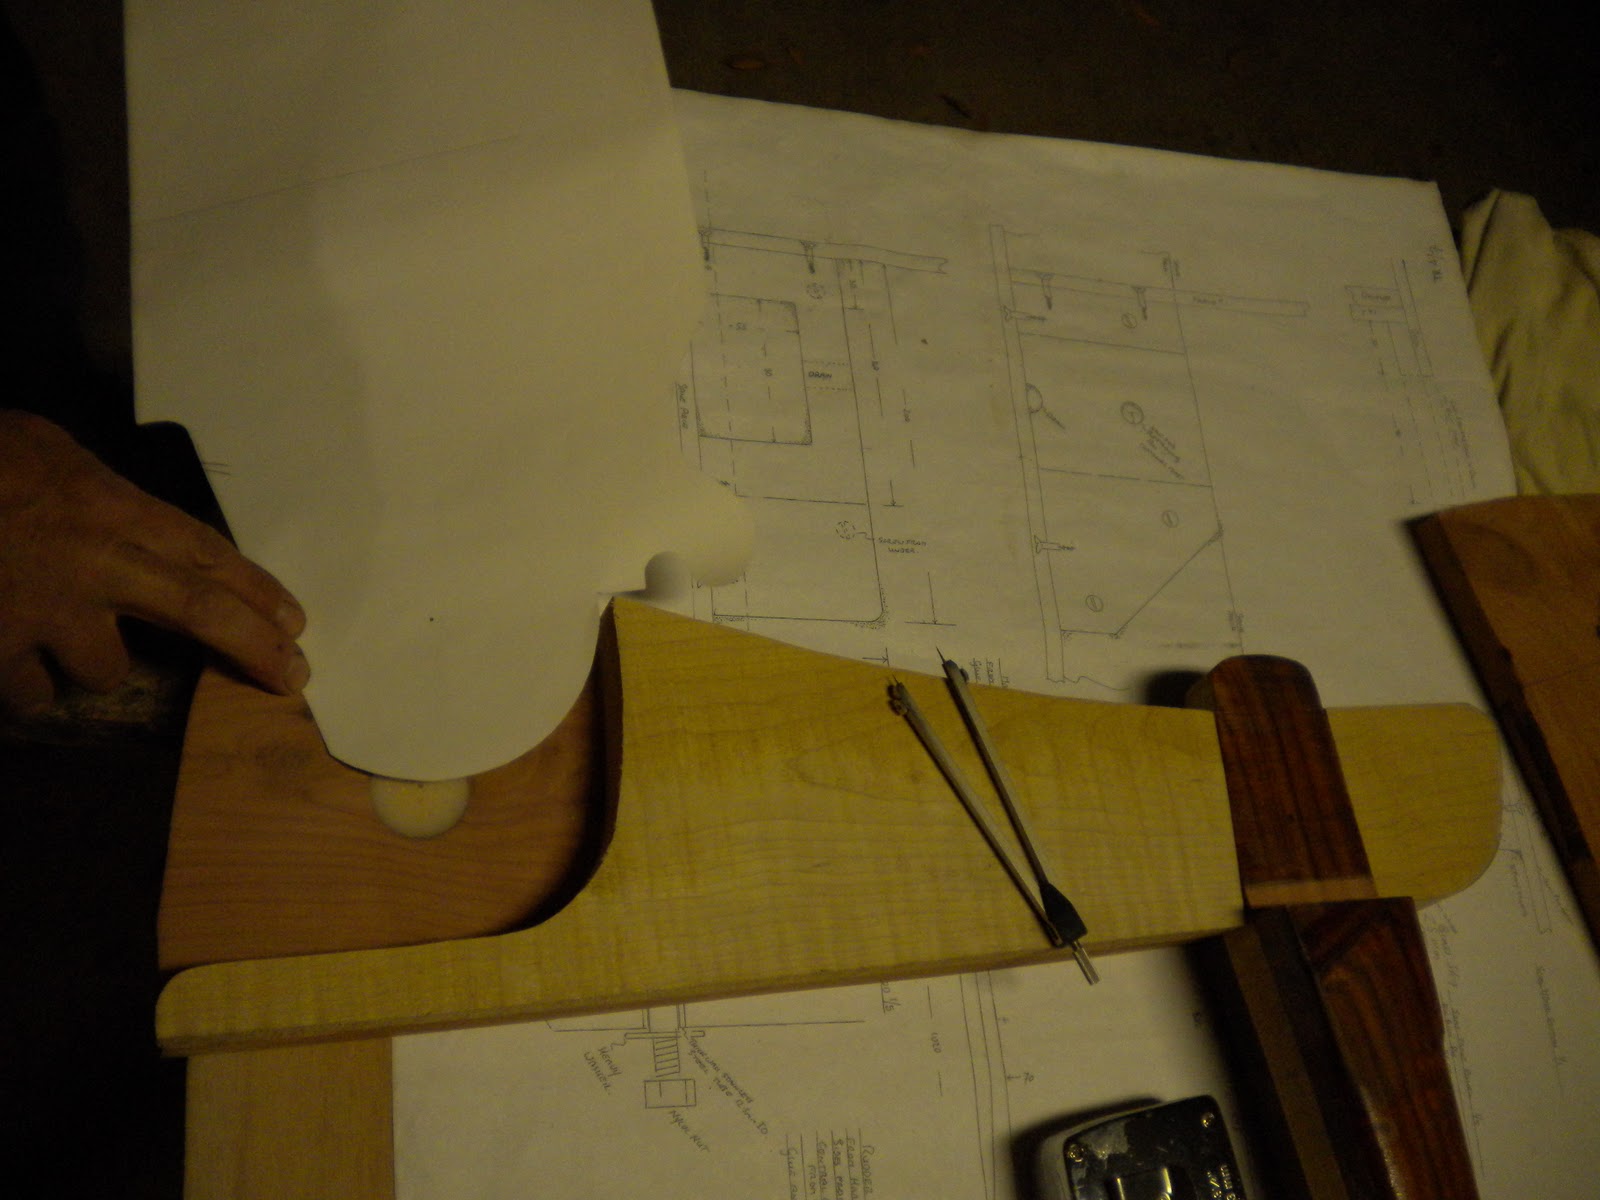
Good thing we've learned from previous encounters with these bad plans to draw or cut out parts on something other than the piece of wood we'll actually be using.  We drew the rudder, following the plans exactly, on a piece of thick white paper.  Then we put the paper rudder with the rudder stock and spacer, and lo and behold, nothing matched up.  
So, thinking that of course we probably don't know what we're doing, just being amateurs, we triple checked all of our measurements.  There were a couple problems stemming from inexperience or mismeasuring, we presume. 
1. Tiller was about 10mm too short - this was an easy fix.  We just cut off 10 more mm of red cedar away from the center maple piece so that the back end of the tiller sticks out of the rudder case far enough, making the tiller a bit shorter, but that shouldn't really matter.
2. Rudder stock spacer was a tiny bit too long, but that will get sanded when we're all done.  Also, we had to cut out more of the curve in the spacer because the point where our pivot bolt will be to the edge of the spacer was about 10mm short.  (Supposed to be 65mm, and ours was about at 55, depending).


Then it was time to tackle the f-ing mess (not our mess).  The top of the rudder did not fit into the rudder stock!  With the pivot holes lined up, the top of the rudder was overlapping the spacer inside the stock - which does not work with two pieces of wood - one cannot overlap another!!  If we moved the pivot hole in the rudder so that we could actually pivot it around inside the stock, it wouldn't match up with the stock on the outside edge this time.  It's hard to explain, but basically when the rudder is down when sailing along, it fit fine, but when it is raised (kicks up if you hit bottom or an oyster bar) the rudder would hit the stock at about 45 degrees or less, so the rudder would still be sticking way down into the water - but it should be at about a 90 degree angle with the stock so that it won't still be hitting things in the water.  Additionally, the knob called for on the plans where the uphaul rope should go wasn't working into the design well, so we decided to chop that off and move the uphaul back on the rudder some to gain more leverage.
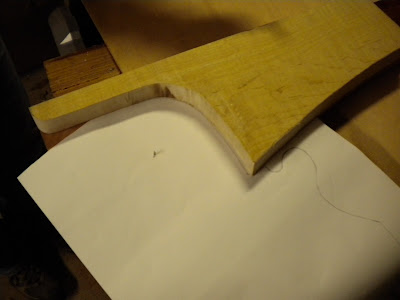
Above: see how the pencil line is being covered by the piece of wood - that's the theoretical rudder overlapping with the spacer - impossible.

Below: The rudder forced to pivot up to 90 degrees - in order for this to be possible, had to move way away from the pivot point, actually to past the top end of the rudder - but wait, you say, there's no wood there to put a bolt through.  That's exactly right.

Below: The rudder from the plans over our redesigned rudder.  The bottoms are lined up, showing how the plans rudder (pencil pointing to it) is way too short with the pivot hole waaaaaaay off.  

So to redesign the rudder we took a fresh piece of paper, keeping the same lines and measurements on the bottom and sides of the rudder.  Then we put the piece of paper in between the stock and spacer and lined up the trailing edge of the rudder with the end of the rudder stock.  We then stuck a nail up through the handy pilot hole we had drilled through the epoxy for the bolt, and stuck that nail through the paper rudder as a pivot.  Then we pivoted the paper rudder along until it was raised, where we were able to draw the outline of the spacer onto the paper to show where the rudder will stop when it is raised and comes in contact with the stock spacer.  This worked really well, and we drew a nice curve along the inside of the spacer on our paper for the top part of the rudder.

From the new paper rudder, we transferred the rudder onto a piece of scrap plywood, cut this out and tested it with the entire rudder stock and spacer before actually drawing and cutting anything on our real rudder.  The plywood test rudder worked perfectly, so we traced it onto our cedar and maple strips and cut it out!  Hoorah, it fits and works properly.  We are awesome boat builders.  And we're never buying John Welsford plans again - if we pay for plans, we feel that we should be able to follow the plans as they are written and build a well-designed boat.  We shouldn't have to be discovering errors and figuring out how to change them to make a boat fit together and float!  


Tuesday, November 15, 2011

11-14.

We worked on the rudder, rudder stock, tiller, and hull yesterday.  


Glued the rudder together - red cedar and curly maple.  We had to make an emergency trip to Brian's last week to straighten up our strips of red cedar.  They weren't square because of the old, sagging saw that we used to rip them.  Fortunately, we were able to run both sides of each piece of wood through a table saw to square them up.  Then they finally fit together tightly, although the rudder might be a tiny bit narrower than called for in the plans... but we're really good at adapting and changing the plans by now!

I don't know why I am so utterly unamused by the soon-to-be rudder!  It's going to be a beauty!
(It could be the mosquitoes - they're really good at biting my neck when I have epoxy-covered gloves on, it's like they know I can't slap them.  But I cannot complain about two or three mosquitoes in November because it is much better than freezing my fingers and toes in Minnesota).


Filling the holes in the rudder stock with epoxy.  There will be a steel tube with a bolt in it here to act as a pivot for the rudder to move up and down.  Just like we did with the centerboard, this prevents any wood-water contact because we'll drill the hole for the tube through the epoxy.


Here is one of our rookie mistakes - when we put together the tiller, we forgot that the base fits into a 25mm gap in the rudder stock (the width of the piece of maple).  We glued the outside pieces of cedar all the way to the back end of the tiller, then realized that we had to get rid of that cedar.  Fortunately, we have a Japanese hand saw, which is awesome.  We just cut of the blocks of cedar, and once the rudder stock is together, we can sand the base of the tiller to fit in.  


We also cut out the blocks of maple that are spacers inside the rudder stock (wood that separates the two pieces of cedar so that the tiller and rudder can fit in between).  We sanded the tiller more - giving it nice rounded edges to make it more comfortable and nicer looking, and painted it with liquid epoxy - it is so pretty now!  And we sanded, washed, and epoxied the hull again.

Tuesday, November 8, 2011

11-7.

 Spent the afternoon making the tiller.  We had already cut out the three pieces - drew out the tiller from the plans on curly maple, then traced the maple outline onto two pieces of a red cedar board.  With the three pieces clamped together, we sanded them until they were all the same size and shape.


With all three pieces, the tiller is too fat for a comfortable grip when steering.  So we sent the two pieces of cedar through the planer.  As I pulled them through the planer, Daddy cranked the blade lower and lower, thus shaving off more wood evenly towards the ends of the boards.  Now the tiller is tapered down to a comfortable width for holding onto (photo later).    


Gluing the tiller together!


Setting all the clamps was tricky - with all the glue in between, the pieces of wood want to slide every which way.  We tried clamping the two ends first, then the middle, then working in from each end, but as soon as we added a clamp near either end, the outside pieces of wood would squish up or down or backwards or forwards, leaving uneven edges.  We ended up putting two screws into the back end of the tiller, one on each side to hold it in place so that we could get the clamps all set with the pieces of wood all lined up perfectly.  That worked well.


Of course I ended up with epoxy all over my gloves, and then proceeded to touch the wood all over while trying to hold it together while we tightened clamps, but then we realized we were going to be gluing the little blocks of wood under the clamps to the tiller, so we had to put slips of wax paper under each wood block.  The wood blocks just keep the clamps from damaging the wood of whatever you are gluing.  


Right before we starting gluing, we noticed a little hole in the outside of one of the cedar pieces.  We stuck a screw driver into the hole to punch out any loose wood, and the hole turned out to be deeper than expected.  We can't have a hole in the tiller (or anywhere else!), so after we finished gluing the tiller pieces, we used a little left over liquid epoxy to mix up a filler for the hole.  By mixing in wood dust into the liquid from the wood that you're filling, you get a filler that matches the wood color.  So we have a nice cedar filler for the hole that will blend right in with the rest of the side of the tiller - hopefully.


Tonight we were planning on gluing the rudder strips together so that we could get on with drawing and cutting that out, but the saw we used to rip the pieces cut them at weird angles because the saw blade sags just a tiny bit (it's a really old saw), so we have to try to fix that before we can put the rudder together.  Right now when the pieces of the rudder are pushed together, there are little gaps and some pieces want to be tilted at a slight angle to meet the edge of another piece.

Tuesday, November 1, 2011

11-1.

Started work on the rudder case and tiller tonight.  This past weekend, Daddy cut out strips of red cedar and curly maple for the rudder, which we'll deal with after we've done the rudder case I think.  The case is going to be made out of red cedar with curly maple spacers, and the tiller will have a curly maple core with red cedar strips on the outside.  We're kind of following the plans for all of this and kind of doing our own thing.  We're also using the Blue Tang (the ~12' Spindrift that my dad built years ago) rig as an example to follow - we had considered using this set up entirely, but realized that it probably wouldn't work well with the Truant's transom (there's a slot for the tiller to come through).  

Brian lent us his bench planer (and lots of clamps and another electric hand planer (way easier to use than the wooden one that looks straight from the 1800's that my dad has), and plenty of other tools and useful things I'm sure).  Anyway, we sent the curly maple through several times until it was looking curly and beautiful, and was 25 mm thick.  Then we drew the tiller from the plans, using a rounded end like that on the Blue Tang, and cut it out.  


We also drew out the rudder case on a piece of red cedar, cut that out, traced it onto a second piece of cedar and cut that out, too.  I still have trouble rounding corners with the jigsaw, so we had to modify the top because I cut out too much on the second piece - oops!  We just re-cut the first piece to match, and now we'll sand them together to make sure all the edges line up perfectly.  We also had to move the lines for where the tiller will fit into the rudder case from one piece to the other.


The red cedar has lots of knots, which is actually bad for use in boat building because they are all weak spots, but we are figuring we'll coat all of this in enough epoxy (and the rudder itself in fiberglass) to protect it, and while it may not be fit for crossing an ocean, it'll be lovely and unique!  

up to Halloween.

We've spent the past couple days sanding the fairing smooth, cleaning the hull, and coating with epoxy.  


The orbital sander is awesome!  It wants to go flying every time it touches the wood, so it's a good arm workout trying to control where it goes.  After I had gone over all of the fairing with the orbital sander, Daddy went back by hand to touch up some spots.  We also went ahead and sanded the rest of the bare wood (it had already had some coats of epoxy - it's getting really tough to keep track of how many coats of epoxy each different part of the boat has now.  For example, I think the transom already had two or three coats before we put the frames together, and now it is getting more along with the hull...).  After I vacuumed the boat, we could see that the hand sanding had resulted in some slight gouges, which I went back and smoothed out with the orbital sander.


We must have vacuumed at least four times - have to go back and clean up all the dust after any tiny bit of sanding.  Once the boat was all clean (wiped down after vacuuming, too), we went ahead with a new coat of epoxy.  I rolled it on and Daddy followed to smooth it out - it's amazing how much of a difference smoothing it out with the little foam brush thing makes.  We just used a very thin layer of epoxy so it wouldn't drip or run on us.


All dry and shiny.  Now all of the little imperfections are noticeable!!  


Thursday, October 27, 2011

10-27.

Fairing.
The fairing epoxy has a totally different consistency than the regular silica that we use for gluing.  Described as peanut butter, it's really more like a putty.


Daddy did the port side yesterday and sanded it down this afternoon to see how it turned out.  It looks good and feels smooth - no more of the little bumps all along the edges of the fiberglass and no more rough, gouged out places in the wood.  

Spreading the fairing on was pretty simple.  We just globbed it on, spread it thoroughly along the fiberglass edges or other spots that needed filling, and then feathered out the edges to reduce sanding when it dries.  


Here's the transom and back end of the boat covered with the fairing putty.  This weekend we'll sand it down and then start putting on more coats of liquid epoxy.  We're also starting to look at colors for the boat.    The suggestion box is open if anyone has any ideas!  We're considering a pale yellow with dark blue trim or a pale greenish color (called blue ice) with either a dark blue or dark green trim.  The interior (seats/decks) will most likely be a creamy, off-white color.  I'm leaning towards a white or off-white sail - my dad's boats have red sails that I'm not too fond of.


Tuesday, October 25, 2011

10-16, 10-25.

Glassing the bottom and seams, and coating the hull with liquid epoxy took most of a day to do.  We had to wait for a sunny day - rain had already pushed us back once or twice and hot weather was also prohibitive because of the epoxy hardening too fast.  We wanted to have a full day to work on this so that we could put down the fiberglass and then coat it with three layers of epoxy in succession to ensure chemical bonds between the epoxy, instead of just physical bonds.  By adding the next layer of epoxy as the previous is just starting to dry (feels "tacky"), the chemicals create a stronger bond when they harden.  


First we laid the dry fiberglass down on the boat to make sure it fit.  We cut out pieces to cover the bow and cut the big back piece to fit along the skeg.  Then we put the cloth aside and painted the wood with a coat of liquid epoxy everywhere the cloth would touch.  We've only been using the wet method of fiberglassing since my dad thinks it makes it easier to get the cloth set in place - which it does seem conceptually easier (since I haven't tried the dry method of not wetting the wood before laying the cloth down).  Anyways, once we painted the wood, we laid the fiberglass cloth back down, one piece at a time and slowly and methodically pushed it into place, pouring more epoxy on top of the cloth.  We used plastic scrapers to spread the epoxy evenly on top of the cloth - the trick is to get the epoxy to soak through the cloth so that the cloth becomes invisible, but not to use too much epoxy.  The other trick is to not work the cloth too much with the scraper because air bubbles start to form under the cloth.  Fiberglassing is fun and not too difficult, although the gas mask can give a person a headache if the straps are too tight.


Pouring the liquid epoxy onto the cloth.


Scraping it along, smoothing it in through the fiberglass.  The pieces we used in the bow were a different thickness and weave than the ones along the rest of the bottom which made it much harder to get the epoxy through the cloth - it took a lot more working and scraping.  We ended up putting several layers of fiberglass on the bow area to make it extra protected.


Here's the boat with fiberglass applied.  By the time we finished attaching all of the fiberglass to the seams, the stuff was getting tacky on the bottom, so we moved straight on to painting the entire hull with another coat of liquid.


Cutting a dart to make the cloth fit around a corner.  I think we might have ruined three pairs of scissors this day.  (Well one pair had already seen their demise from previous epoxy and fiberglass adventures, so we had to steal some more from the house).


Tonight (10-25) we sanded the hull to prepare for fairing.  Daddy had already sanded one side, so we just worked on the other side and all the epoxy humps and bumps and borders.  I used the fun little vibrating sander to get the wood and  smoother fiberglassed areas and Daddy used the big hulking belt sander to get the fiberglass edges that were really sticking out and the overlapping fiberglass areas that were really thick and bumpy.


Last time I had to wear a hazmat suit was spraying reed canary grass up in Minnesota with blue-dyed round up - not fun.  This time around is way better!!  And it is really nice to wear these when sanding because you get totally covered in super fine particle dust, which with fiberglass and epoxy in the mix is not something particularly nice to have stuck all over your clothes and exposed skin.

After we finished sanding, we vacuumed the boat to get the obvious dust off, then we used special scrubbers (sort of like the non-scratch abrasive pads for pots and pans) with water to take off the amine blush and lightly sand while removing the hiding particles.  Then to be extra sure we were getting all the particles off, we went back over the boat with wet rags, then dry rags.  We might have to repeat this sanding and washing process again after we get a look at the boat in the daylight to see if there are any patches that we missed.  Once that is done, we will move on to fairing - fixing the imperfections of the fiberglass edges and places I gouged out when sanding earlier on.